Plot: The need to migrate Exchange mailbox to Office 365 and the methods to perform the migration are all explained in this write-up. Also, learn the basic information about Exchange server. Stick to the blog to completely understand the procedure.
Exchange server is a mail server offered by Microsoft which can be deployed on Windows OS only. Each day more and more organizations plan to move from Exchange On-Premise to Exchange Online i.e. Office 365 for its features.
Due to the enhanced features of Office 365 which can help manage the data, reduce capital costs, etc., many users want to learn how to migrate exchange 2013 to office 365 step-by-step.
You may find that there are many solutions to export the mailbox data to Exchange Online upon researching over the internet. But, these methods are both complicated and require technical expertise.
If a non-techie tries to perform the process for the first time, there is one thing or the other that may go wrong and the user may not be able to complete the process successfully.
To avoid going through such troubles, experts have brought out an instant solution that we will explain here. Let’s get going!
Methods to Migrate Exchange Mailbox to Office 365
There are three manual methods that can be used to export Exchange data that are given below:
- Staged Migration: You can perform the Staged Migration process to move the data in batches from Exchange 2003 & 2007. It can export around 2000 mailboxes from On-Premises Exchange server.
- Cutover Migration: This migration method allows users to export mailboxes less than 2000 in number from Exchange server 2003, 2007, 2010, and 2013. It is suggested by Microsoft itself this method to companies with less than 150 users account for the process to migrate Exchange 2013 to Office 365 step-by-step can be time-consuming.
- Hybrid Migration: With the help of Hybrid Migration, you can integrate your Office 365 account with Exchange servers and synchronize them for data transfer. It is possible for you to export over 2000 mailboxes in Exchange server 2010 and above by enabling the hybrid deployment connectivity.
You may think that these methods are as simple as they seem but they are not. There are a lot of steps to follow of before going through the actual migration task.
And the risk of data-loss is always hovering over a user’s head using these methods to migrate Exchange mailbox to Office 365.
Which Solution Can Overcome the Limitations of the Manual Methods?
There is only one solution that you can apply to fulfill your requirements i.e. Exchange On-Premise to Office 365 Migration Tool. This is a highly advanced tool which supports multiple user accounts’ migration all at the same time.
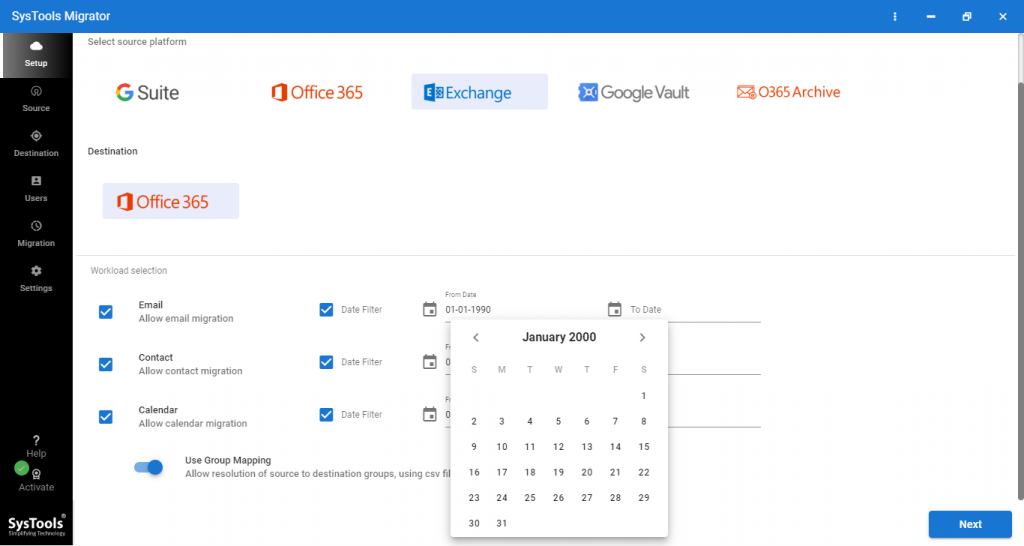
This tool offers a number of features that can be used for selective data export by activating the Date-Based filter. This filter will allow you to set a certain time range from which the software will export the data.
Before learning more, find the steps of the tool.
Migrate Exchange 2013 to Office 365 Step-by-Step Using the Software
1. Launch the utility and click on the Activate button at the bottom-left corner of the window. From the Setup tab, select the Source as Exchange and Destination and Office 365.
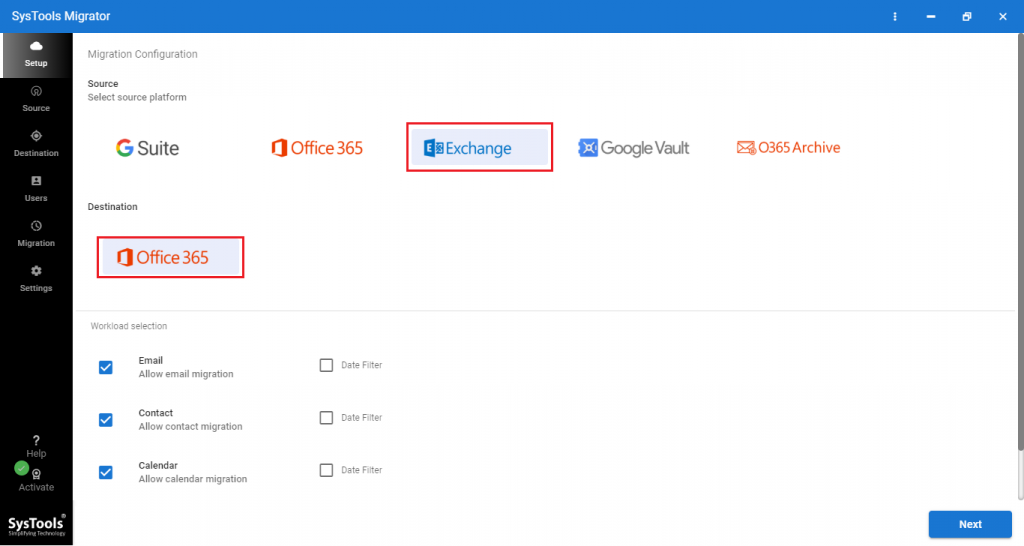
2. Choose the Category and apply the Date-Filter for each if needed in the Workload Selection
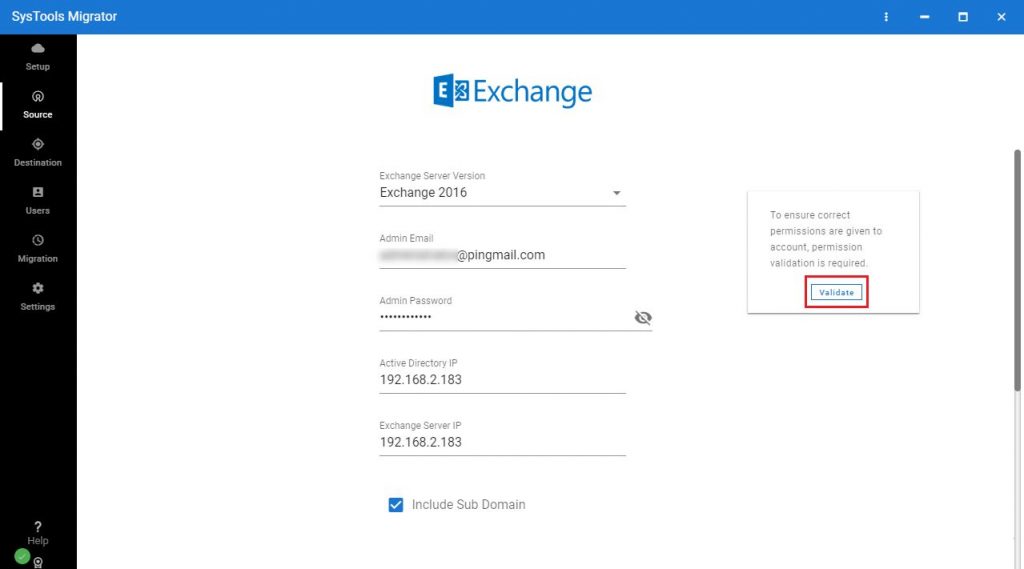
3. Fill in all the details required for Exchange in the Source Window and Validate it. Click on the Next button to move forward.
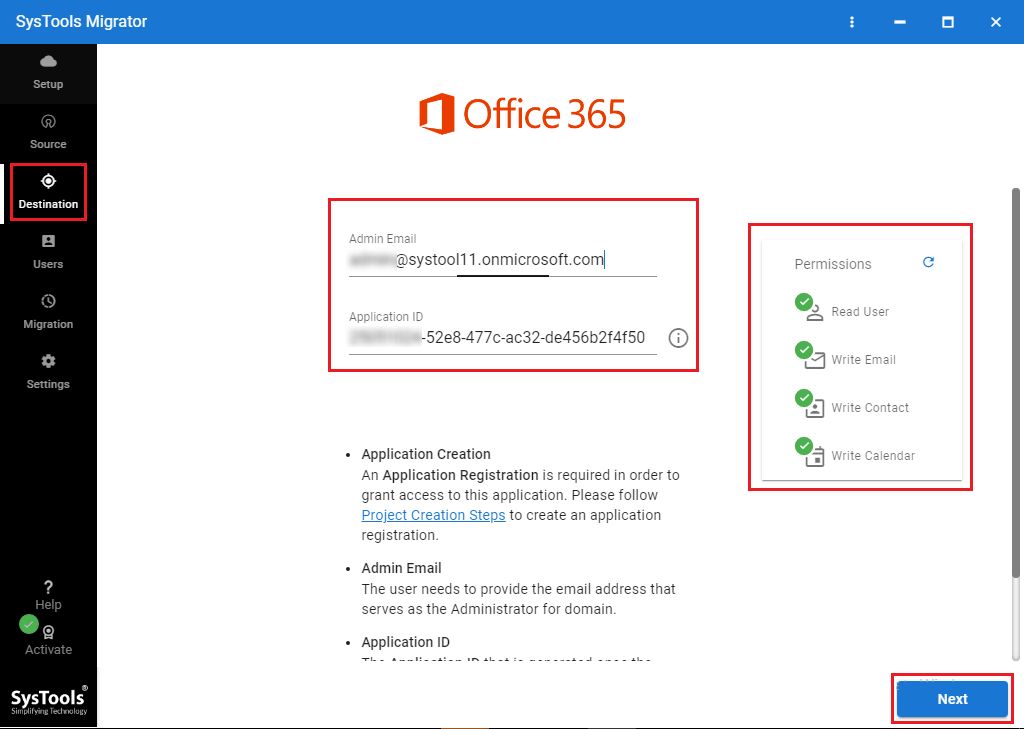
4. After that, go to the Destination Window and enter the credentials for Office 365, hit Validate and Next to migrate Exchange mailbox to Office 365.
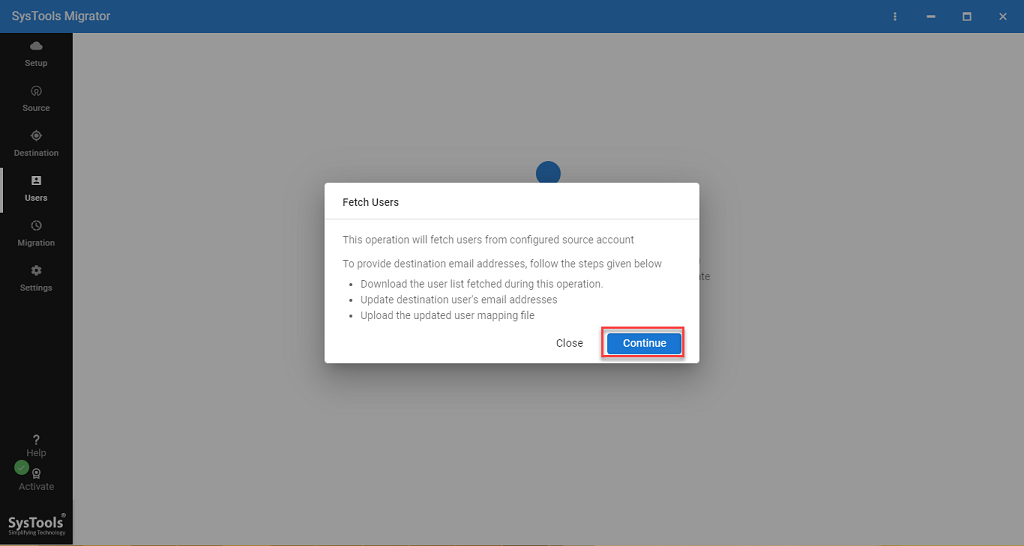
5. Select the option to import the list of users, these are the steps for Fetch Users Hit Continue and Validate.
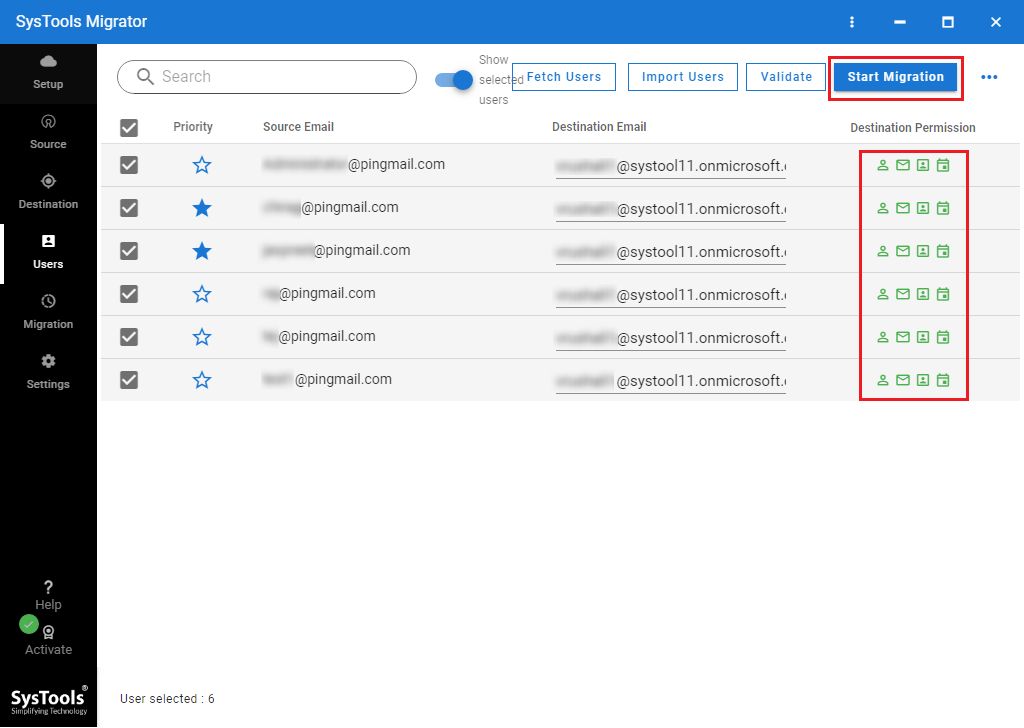
6. In the final step, you can choose to set the priorities here to export certain mailboxes before others and then hit Start Migration
When the process is completed, you can download an export report to check the details of the process. It can either be a Summary Report i.e. shows the summary of the data downloaded. Or the Detailed Report i.e. the detailed report of each mailbox in a CSV file.
After you migrate Exchange 2013 to Office 365 step-by-step, you can choose to run the migration process again in 3 different modes:
- Retry Failed Items: This option permits to export the failed or skipped items of the first migration process.
- Re-Run Full Migration: Using this feature, you can perform the entire migration process again.
- Delta Migration: With the help of this feature, you can export only the newly arrived data after the first migration process.
In Brief
Exchange On-Premise is a great email server and offers a number of functionalities for business growth. But users migrate Exchange mailbox to Office 365 to use the functionalities and features of Office 365 Suite.
The manual methods are not so suitable for non-tech users due to the complex method and risks involved. To resolve this issue, you can use the software as explained for a safe and secure migration process in bulk.


