How to use the innovative SeekaHost WordPress Hosting Platform (SeekaPanel) for Easy Website Management?
Anyone looking to set up and manage a website requires a so-called web hosting control panel and content management system.
This guide will demonstrate how easy it is to build a website with WordPress and the SeekaHost WordPress hosting control panel in a matter of minutes. The outlined steps can be tested with the free 7-day trial at SeekaHost.
What is different about the SeekaHost WordPress hosting platform?
The recently launched SeekaPanel is built by experienced software developers from ClickDo on the www.seekahost.app. It is a blog hosting platform that helps its user to create and manage a self-hosted WordPress site, offering various unique integrated functions like domain name registration, web hosting management, SEO data tracker integration and addons and other tools accessible in one dashboard.
Starting a WordPress blog has never been easier with the SeekaHost WordPress hosting as it offers a solution to host WordPress sites with multiple IP hosting as well to easily host private blog networks.
In this SeekaHost WordPress hosting control panel step-by-step guide you will find out how to set up a website by registering a domain and hosting your site with SeekaHost within a few minutes.
Important Facts about the SeekaHost WordPress Hosting Control Panel
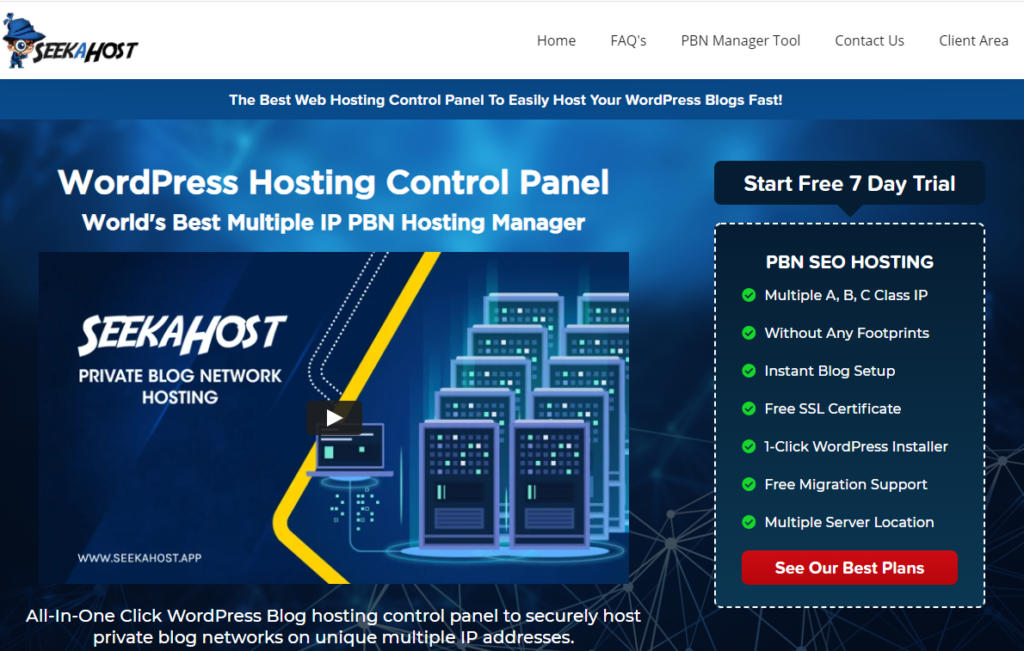
SeekaHost is a web host that is a leader with multiple IP PBN hosting and WordPress hosting. Its hosting manager is designed with a 1-click WordPress installation feature to host a WordPress site securely and quickly within 60 seconds.
The SeekaPanel offers a 1-click solution for starting and setting up a WordPress website, but it offers more features such as:
- DDoS protected servers to prevent DDoS attacks for ultimate safety & security.
- Regular malware scanning for zero website vulnerabilities and interruptions.
- Simple and easy to use interface with 1-click installers.
- Guaranteed uptime and fast loading speeds.
- 1-click manual backups.
- 1-click SSL certificate activation.
- Tracking site features for Google Analytics and Clicky inside the SeekaPanel.
How to Set up a WordPress Website with the SeekaPanel – Easy Step by Step Guide
Before you can set up a website you require web hosting.
The SeekaHost WordPress hosting plans are available with the SeekaPanel, cPanel, or Plesk control panel and start from $1.49/month. The easiest and fastest way to launch a WordPress site is with the SeekaPanel.
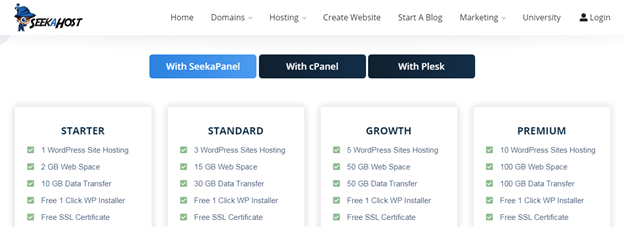
Choose annual billing so you can save money compared to monthly billing.
Now follow these easy steps to set up a WordPress website with the fast 1-click WordPress installation.
Register your Domain
Visit the SeekaHost website and enter the domain name in the search box.

Click on “search”, and if the domain is available, create your account. Domain registration starts at $10.5 per year.
After you have created your account, you have the option to add DNS management, and email forwarding free addons.
Complete the form by filling in your details and choose your payment method. By agreeing to the terms and conditions, you can proceed to the final checkout.
You should receive a confirmation email for the domain registration.
Purchase the WordPress Hosting Plan
Register with the SeekaHost App and choose the WordPress Hosting plan of your choice with SeekaPanel. Click on the “Buy Now” button and purchase the hosting.
Verify the email and proceed with the hosting subscription.
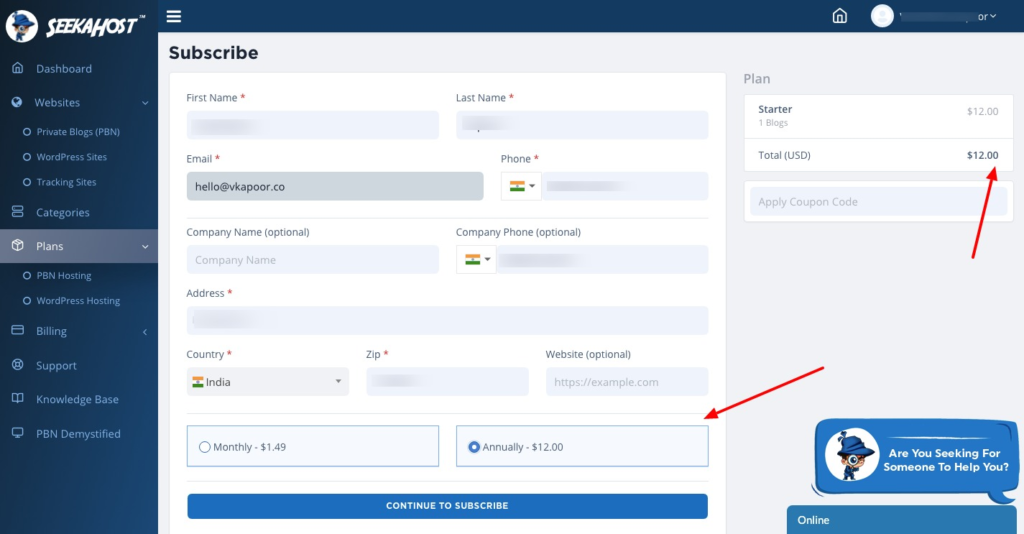
Enter your personal details and choose either monthly or annual billing. Continue to subscribe and proceed with the payment.
Set up a WordPress Website
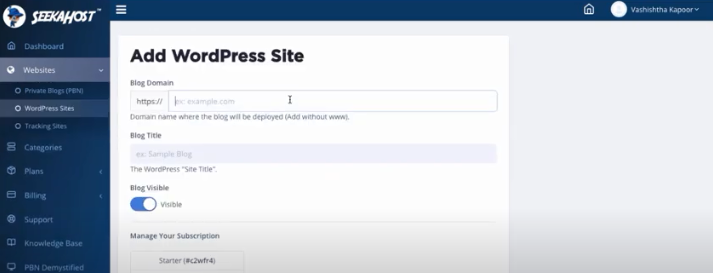
Setting up a WordPress website can be done with one click in the SeekaPanel.
Simply click on “create a WP site” and enter your domain name, blog title, and choose the subscription. Click on the “Add WordPress Site” button and your website will be online in 60 seconds!
You then need to change the nameservers inside the SeekaPanel.
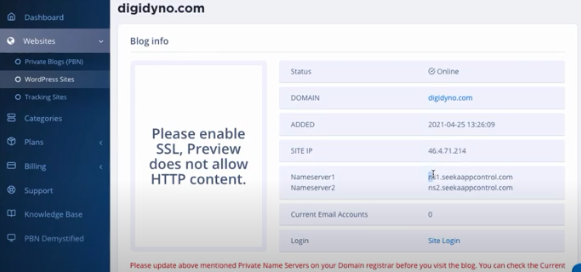
To change the nameservers, copy both the Nameserver details, and click on the domain, and then Manage Nameservers inside your SeekaHost account. Next, click on “use custom nameservers”, and paste both the nameservers details and save.
You can also watch this tutorial on the SeekaHost YouTube channel: https://youtu.be/mIRX4dAb4lY
You can then activate your free SSL certificate with the fast and easy 1-click SSL installation in the SeekaPanel.
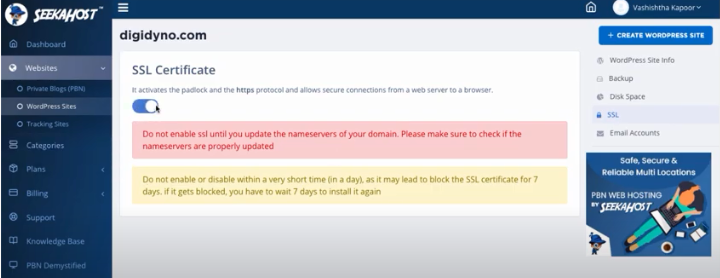
You can then begin with website customization and if you are new to WordPress then you can find tutorials and FAQs inside the knowledgebase in the SeekaPanel or on seekahost.org.
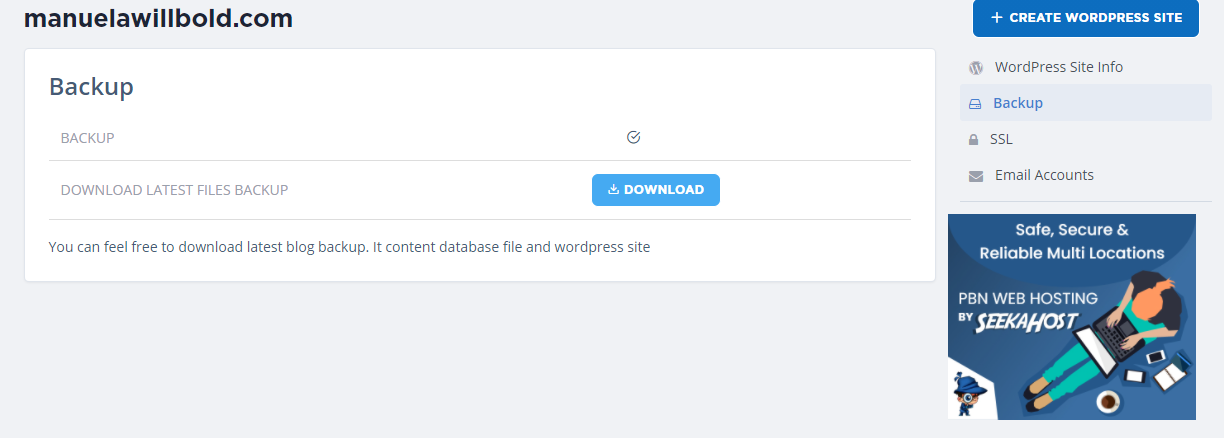
Your WordPress blog data and content are crucial, and you do not want to lose it after publication. You can take 1-click backups of your entire website content and save it to your local computer.
You have the additional option to create a website email for free.
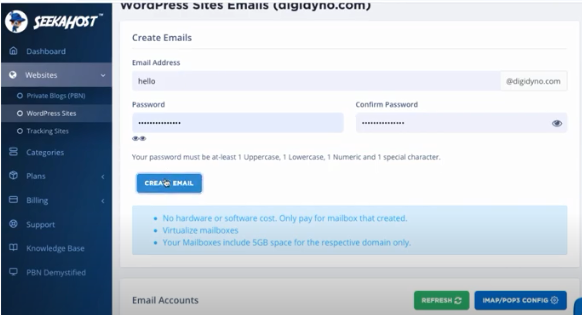
Simply enter an email address and a password and you can create your custom email address for your domain.
To activate the tracking sites, feature where you can view live traffic data by linking your Google Analytics and Clicky account with the SeekaPanel, you can watch this short tutorial: https://youtu.be/7NidoPvdG9M.
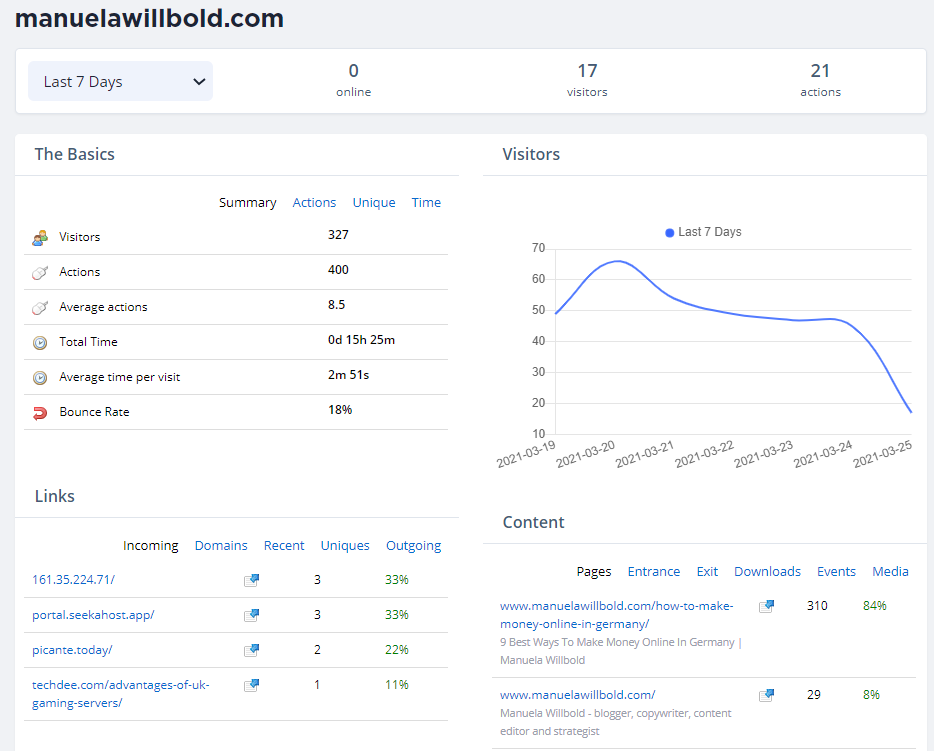
Managing your Website with the SeekaPanel is easy and fast
As shown in the step by step guide it is very simple and convenient to set up a website with the innovative SeekaPanel even for a beginner.
The user-friendly SeekaPanel therefore enables any user at any expertise level to not just easily create and host one website, but many as they find an overview of all their hosted sites in their dashboard. From here the websites can be monitored with the tracking sites feature, the hosting can be flexibly adapted by up- or downgrading plans, the backups can be downloaded in one click and the technical support team can be contacted through the live chat or ticket support regarding any issues with any website.
So, do not let technical complexity hold you back from starting your own web presence and get online.
Author bio:
Manuela Willbold – Online Media and PR strategist
I am a regular blog contributor on various news magazines and manage the PR for ClickDo and SeekaHost. I have taken a summer course at the London School of Journalism, a one-day course at the City of London University in writing for the web and am myself a course instructor at the SeekaHost University where I teach SEO content writing.
Social:
FB: https://www.facebook.com/seekahost
Twitter: https://twitter.com/atSeekaHost
LinkedIn: https://www.linkedin.com/company/seekahost
YouTube: https://www.youtube.com/channel/UC4GpPx41PZ_4-e-wa_oltAQ


