In a world where video communication dominates how we share knowledge, conduct business, and create content, screen recording tools have become essential. Whether you’re recording online meetings, software tutorials, live streams, or gameplay footage, having a fast, reliable, and easy-to-use recorder can save time and elevate your productivity. Among the growing list of tools available, Swyshare Recordit stands out for its simplicity and performance.
This review explores everything you need to know about Swyshare Recordit—from its core features and technical specifications to its usability, pros and cons, and pricing. By the end, you’ll know whether this screen recording tool is the right fit for your needs.
1. What Is Swyshare Recordit?
Swyshare Recordit is a lightweight yet powerful screen recording software developed for both Windows and macOS. Designed with simplicity in mind, Recordit allows users to capture high-quality screen recordings with or without system audio and microphone input. With an intuitive design, Recordit suits beginners and casual users while still providing advanced options for power users.
Whether you’re an educator, gamer, software developer, or business professional, Swyshare Recordit offers a clean and responsive experience without overwhelming you with complex settings or unnecessary features.
2. Key Features of Swyshare Recordit
Here are the standout features that make Swyshare Recordit appealing:
- One-Click Recording
With just one click, you can begin recording your entire screen or a selected window. This is especially helpful for quick tasks or spontaneous moments that need capturing fast.
- Record Audio from Multiple Sources
You can choose to record:
- System audio (what your computer plays)
- Microphone audio
- Both system and microphone audio simultaneously
This flexibility is ideal for tutorials, podcasts, or voice-over narration.
- Custom Recording Area
Instead of recording the full screen, you can select a specific portion of the screen—perfect for focused tutorials or hiding sensitive information.
- Lightweight and Fast
It consumes minimal system resources, which is crucial when recording CPU-intensive tasks like gaming or video editing.
- Multiple Export Options
You can export your recordings in popular formats like MP4, AVI, or MOV, giving you flexibility depending on your use case.
- Screenshot Tool
Swyshare Recordit also includes a built-in screenshot feature, allowing users to capture still images without launching another app.
3. Tech Information of Swyshare Recordit
Let’s take a quick glance at the technical details and platform compatibility of Swyshare Recordit:
| Tech Information | Details |
| Version | 1.0.0 |
| Supported OS | Windows 10 and newer; macOS 11 and newer |
| Hardware Requirements: | l RAM: 1GB minimum
l Disk Space: 512MB minimum l Architecture: 64-bit processor is required |
| Supported Formats: | l MP4, AVI, MOV, GIF
l MP3, AAC, FLAC l JPG, PNG |
| Audio Support | System audio, microphone input, or both |
| Resolution Support | Up to 4K screen recording |
| File Size Handling | Efficient compression to reduce file size without major quality loss |
| Free Support & Updates | Yes |
4. How to Use Swyshare Recordit to Record Screen?
Use this step-by-step guide to quickly begin recording with Swyshare Recordit:
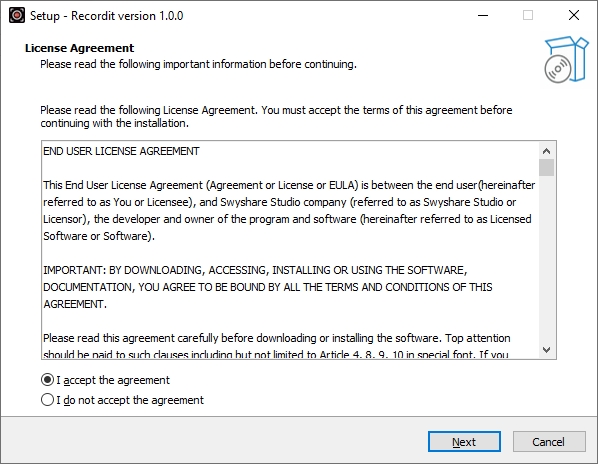
Step 1: Download and Install
Head to the official Swyshare website, download the latest Recordit version for your OS, and install it by following the on-screen prompts.
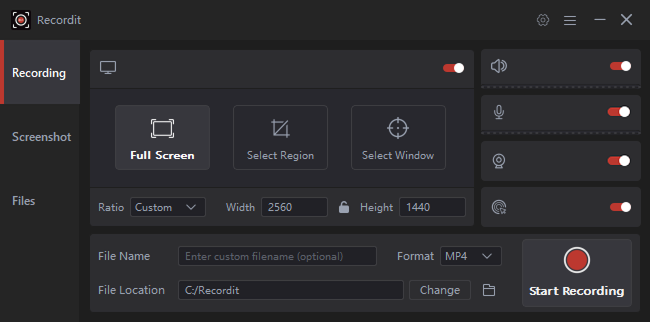
Step 2: Open Swyshare Recordit & Choose Recording Settings
- Choose whether to include system audio, microphone audio, or both.
- Choose whether to enable the webcam or keep it off.
- Adjust output settings such as format and file location.
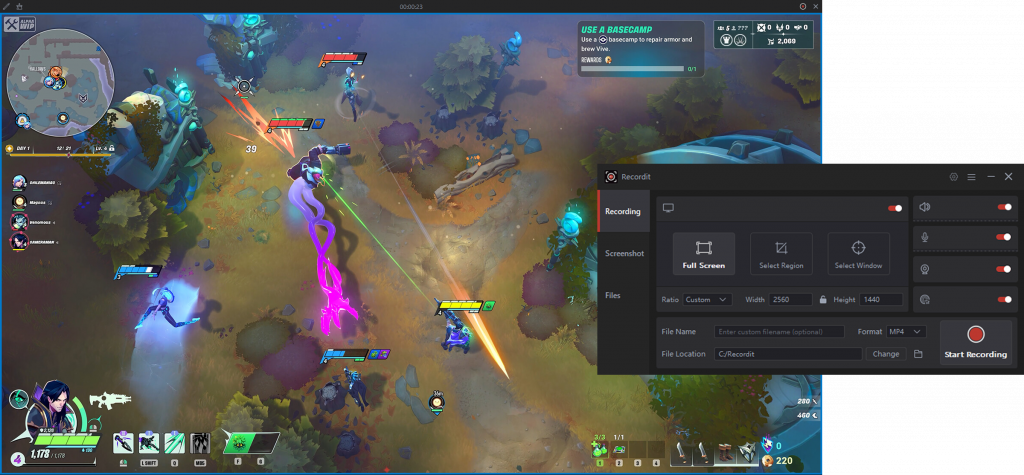
Step 3: Set the Recording Area and Start Process
Select full screen or a specific region, then click the “Start Recording” button to begin. A small overlay bar will appear with pause and stop buttons.
Step 4: Stop and Save
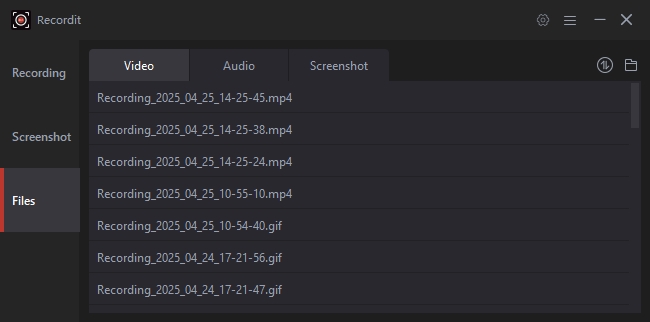
When finished, click the “Stop Recording” button. You’ll then be prompted to preview the recording within the software “Files” tab.
Step 5: Take Screenshots (Optional)
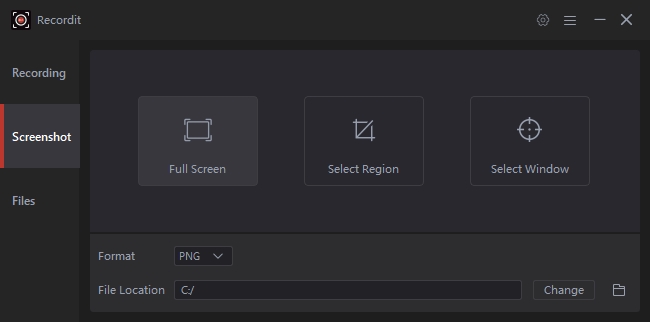
Use Recordit’s “Screenshot” tool to capture your entire screen, a specific window, or a selected area, then preview and save the image immediately.
5. Pros and Cons of Swyshare Recordit
| Pros: | Cons: |
| ☑ User-Friendly Interface: No steep learning curve
☑ Fast Setup and Recording: Great for quick tasks ☑ High-Quality Output: Supports HD and even 4K resolution ☑ Low System Resource Usage: Doesn’t slow down your PC |
☒ Limited Editing Tools: Not suitable for in-depth post-production
☒ No Cloud Integration: Lacks direct upload to platforms like Google Drive or YouTube ☒ No Scheduled Recording: Lacks built-in scheduling for recurring recordings |
6. Swyshare Recordit Pricing
Swyshare Recordit offers both free and paid versions:
| Free Version | Paid Plans |
| ☑ Full-featured recording
☑ Maximum recording duration capped at 10 minutes. ☑ Export with watermark |
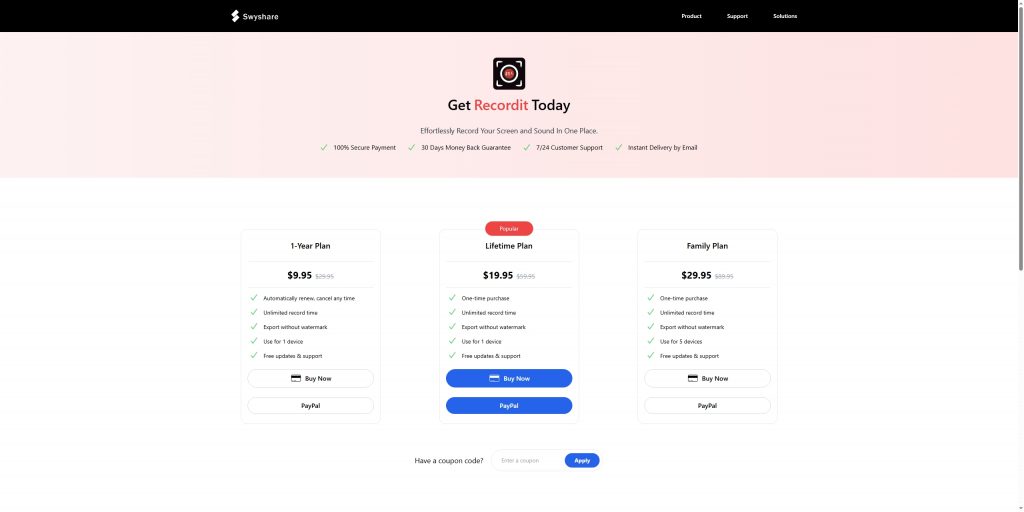
☒ 1-Year License: $9.95
☒ Lifetime License: $19.99 ☒ Family License: $29.99 |
Swyshare comes with a 30-day money-back guarantee for all plans, so users can purchase a Recordit license with confidence and try it risk-free.
7. Conclusion
Swyshare Recordit lives up to its promise of being simple, fast, and effective. It’s an excellent screen recording app for users who value ease of use, lightweight performance, and clean video output. While it may lack some advanced editing or automation tools, it excels in doing what it’s designed for—quick, high-quality screen recording without distractions.
Whether you’re capturing a tutorial, recording gameplay, or saving a video call, Swyshare Recordit offers a hassle-free experience that makes it a worthy addition to your productivity or content creation toolkit. For users seeking a one-time purchase with solid performance, the lifetime license is especially appealing.
If you want a screen recorder that’s both user-friendly and powerful, Swyshare Recordit is well worth trying.


