We come across a lot of screens that we wish to revisit over and over again. It can be a tutorial, seminar, live streaming, presentation, or a conference call that we wish to record. In such scenarios, screen capture for Windows can be the best utility to record the screen. There are a few inbuilt options that can help you record a small clip however there are no editing or formatting options.
The best screen recorder for Windows 10 comes with advanced editing features to record sound, mouse clicks, or your webcam feed along with the screen capture. If you want to create professional videos or tutorials, the best screen recorder software can help you with the task. Let’s explore the manual methods first and then check out the best screen capture for Windows.
Inbuilt Screen Recorder for Windows 10
Until Windows 7, we always needed the best screen recorder for Windows 7. Later, with the release of Windows 8, Microsoft introduced Xbox Game Bar. It has a special utility to record your gameplay or any other activity on your screen. Before we use this utility, we need to ensure that it is turned ON.
Configure Xbox Game Bar
Step 1. Right-click on the Start button and select the Settings option from the list.
Step 2. Click on the Gaming option to access Xbox Game Bar settings.
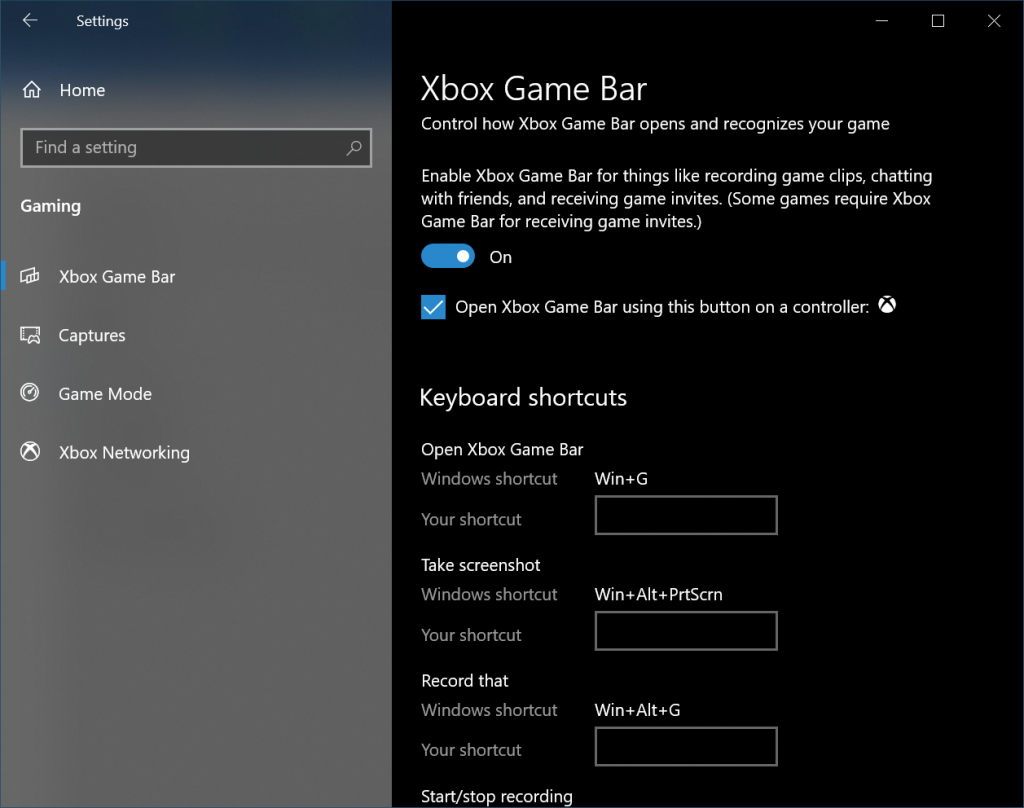
Step 3. Toggle ON the Xbox Game Bar service and remember the shortcut keys to access and use the utility. You can also configure your own shortcut keys on this screen.
Step 4. Click on the Captures tab in the left-hand side panel. Here you can configure the capture settings, capture length, record audio, Mic, audio quality settings, Mic Volume levels, video frame rate, video quality, and more.
Screen Capture
Step 5. Press (Win + G) to access the Game Bar. Check out the Capture region on the left. Here you will find buttons to take a Screenshot, record the last 30 seconds, start recording, and record with Mic.
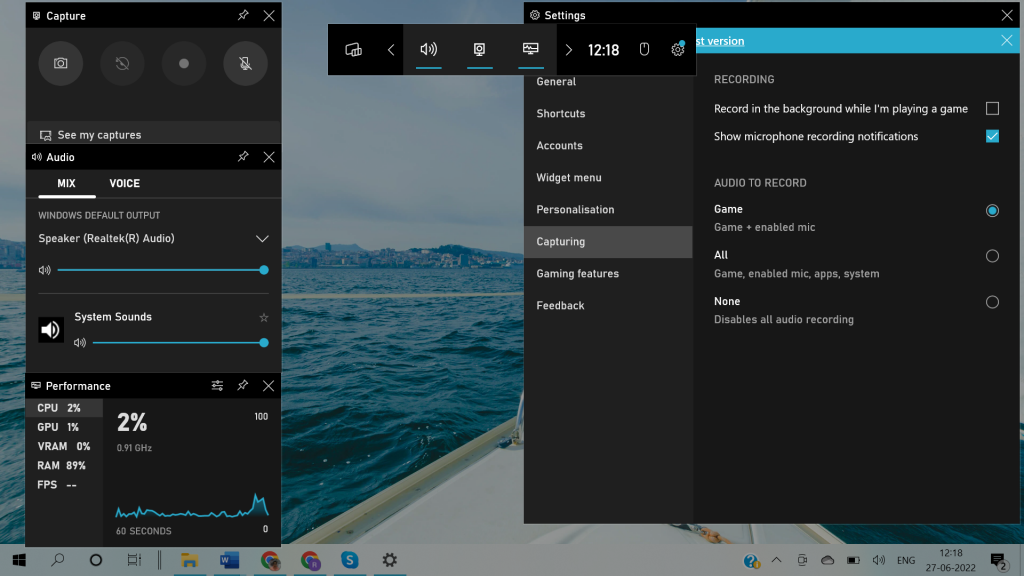
Step 6. Click on the Start Recording button or press the (Win + Alt + R) shortcut to start recording. You will observe a recording progress bar with pause and stop options. You can enable or disable mic or mouse clicks during the recording.
Step 7. Click on the Stop button once done and the recording will be automatically saved in the default Capture folder (C:\Users\UserName\Videos\Captures) in Videos.
PowerPoint Screen Recorder
We have always used MS PowerPoint to make or view presentations. Not all users are aware of the hidden screen recording feature in MS PowerPoint. If you are using office 365, Office 2013, 2016, or 2019, you can explore this free screen recorder feature to capture screens.
Step 1. Press the Start button, type PowerPoint, and click on the Microsoft PowerPoint App.
Step 2. Click to create a new blank presentation and get on slide 1.
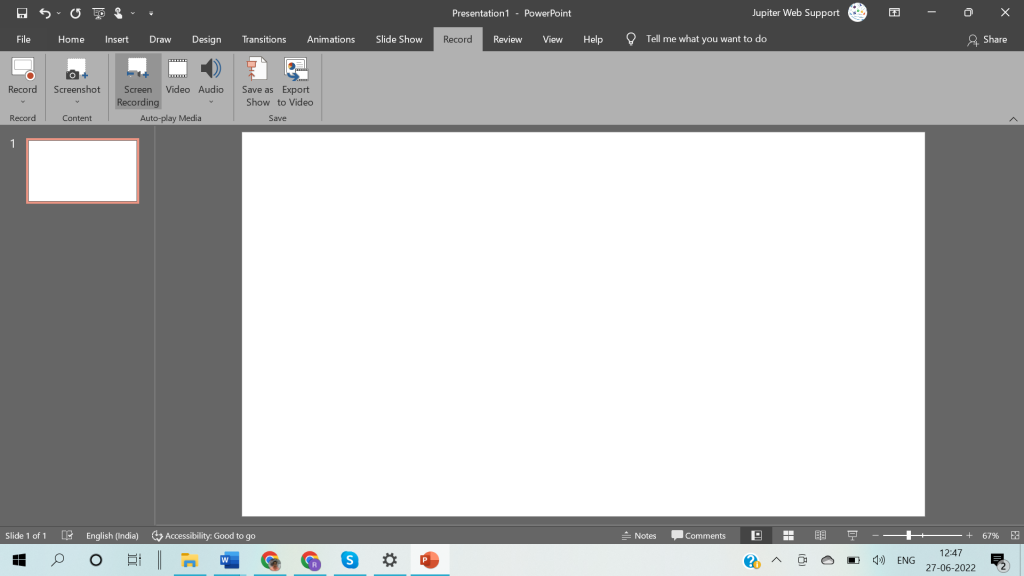
Step 3. Go to the Insert menu and under the Media section, click on the Screen Recording option. If you have installed the latest updates, you may find a Record menu with all the recording options.

Step 4. The recording progress bar will come up with options to start recording, select an area, add audio, and add a pointer. Drag to select the area to enable the recording button. Click on the record button and come to the screen that you wish to record.
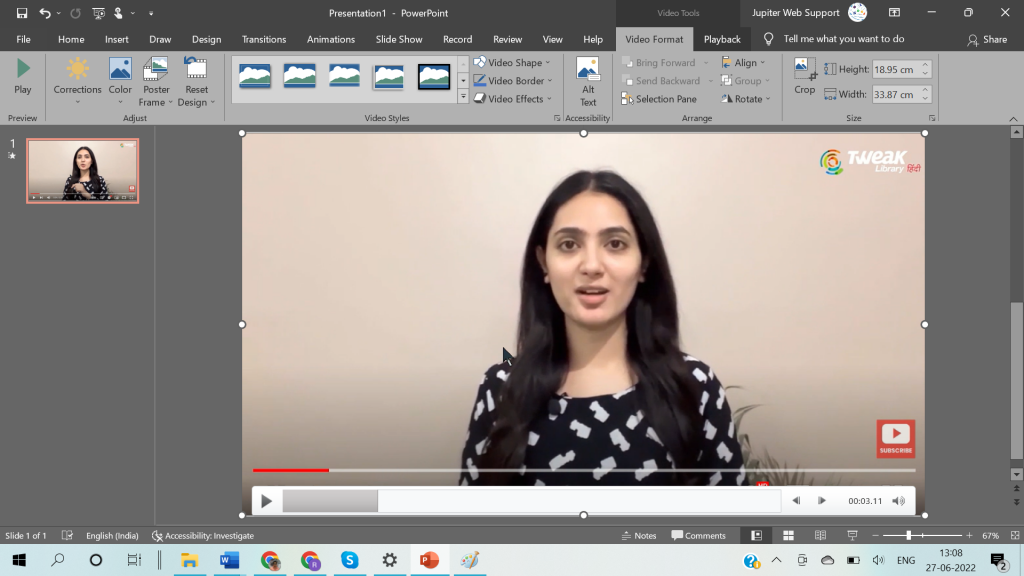
Step 5. You can click to add audio or mouse clicks during the recording. Click on the Stop button once done and the video will be added to your slide.
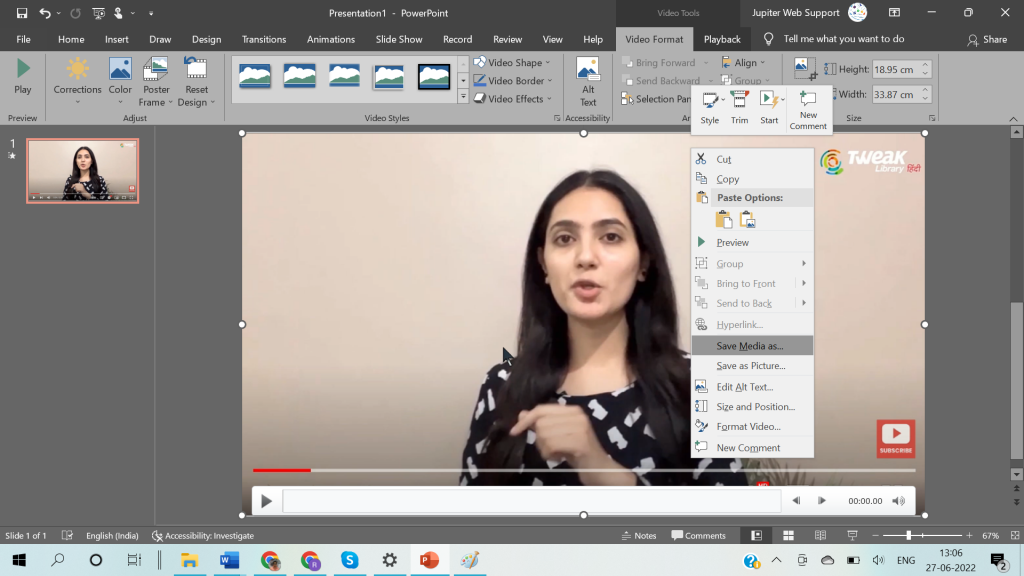
Step 6. You can save the presentation or save the video to your computer. Right-click on the added video and click on ‘Save Media As…’ to save the video file.
Use the Best Screen Recorder for Windows 10
The inbuilt utilities can only offer you the record function. If you want to avail all the editing features, filters, effects, broadcasting, or sharing features, you will need the best screen recorder for Windows 7 and above versions. We have tried and tested the top screen recorders for Windows and listed the best screen recorder for Windows 11 and earlier versions.
TweakShot Screen Recorder
Platform: Windows
OS: Windows 11 and earlier
Price: USD $39.95 / Year
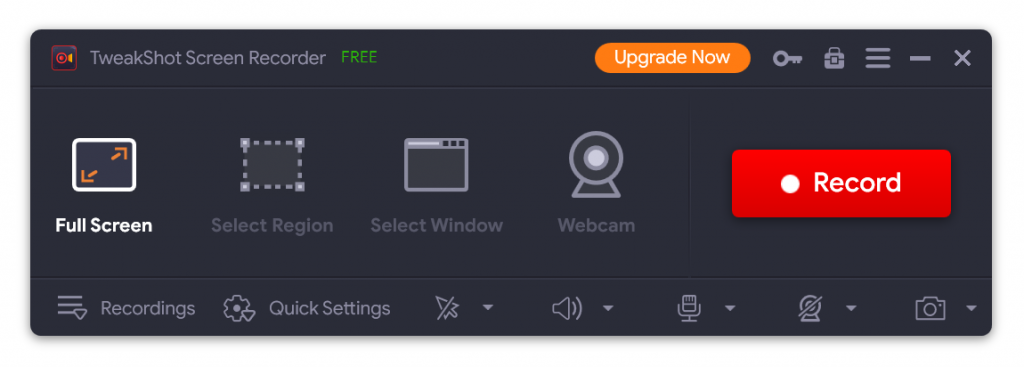
TweakShot Screen Recorder is an ultimate screen capture and recording tool to record 4K Ultra HD videos. It has great compatibility with Windows 7, 8, 8.1, 10, and 11 (32-bit & 64-bit) versions. You can record gameplay, webinar, conference calls, sessions, videos, or live streaming just with a single click. You can configure the quick settings and start screen recording.

The free screen recorder (Trial Version) comes with limited features. You can explore and unlock all the features by upgrading it to a premium version. You can customize screen recording settings and record great videos in multiple video file formats. You can edit videos, add, edit, or remove watermarks to personalize your videos. You can record full-screen video, record scrolling screen, selected window, a region, or webcam feeds with audio and mouse clicks.
Summing Up
Screen capture or screen recording is one of the essential tasks these days to have your own personalized videos. It is highly required in the educational field to create creative tutorials. The inbuilt screen capture for Windows may not be enough to fulfill all your recording needs. TweakShot Screen Recorder is one of the best screen recorder software for Windows to create amazing videos.


