In this article, we will discuss about the need and techniques to import PST file into Office 365 Webmail. To complete the task we will be explaining detailed working of manual solution using Outlook and an automated tool to overcome all manual solution limitations. So, read both the methods carefully and pick the best one for your task.
Why Such Data Migration Is Required?
Office 365 is a prominent email client application which is being preferred by many users. It is well known for its advanced features which makes it stand out from its competitors. The most unique feature of Office 365 is that it provides Outlook with an online feature. This allows the users to gain access to Outlook from anywhere and at any time.
The other name for Outlook with an online feature is Outlook 365. Similar to Outlook, Office 365 also supports PST file format.
A need to import PST file into Office 365 may arise at any point of time. The probable reason could be that the user is switching from Outlook to Office 365 due to its advanced and updated features. Therefore, he needs to migrate PST file from Outlook into Office 365.
Techniques to Import PST File into Office 365
There are possibly two methods in order to perform the task:
- Manual Method – Using MS Outlook to configure Office 365 account and importing PST file in it using Import/Export Wizard. This method is best for single user.
- Automated Method – No configuration require, login and import PST file into multiple Office 365 accounts simultaneously.
Manual Method To Perform Import
Step 1:
In this method, first of all you need to configure Office 365 account into Outlook application.
The following are the steps in order to configure Office 365 account into Outlook:
- Open the Outlook application.
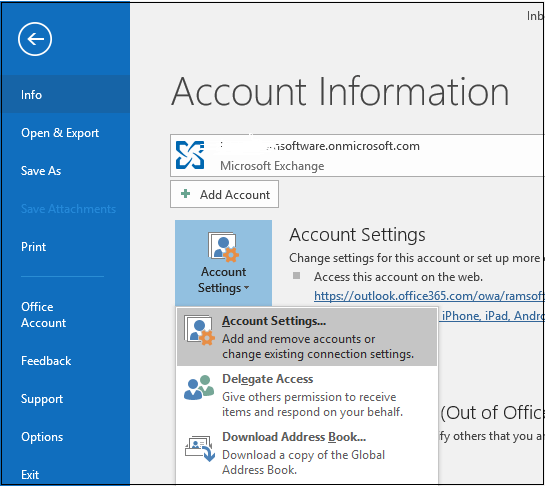
- Go to ‘File’ tab and click on ‘Account Settings’ as shown in Figure A.
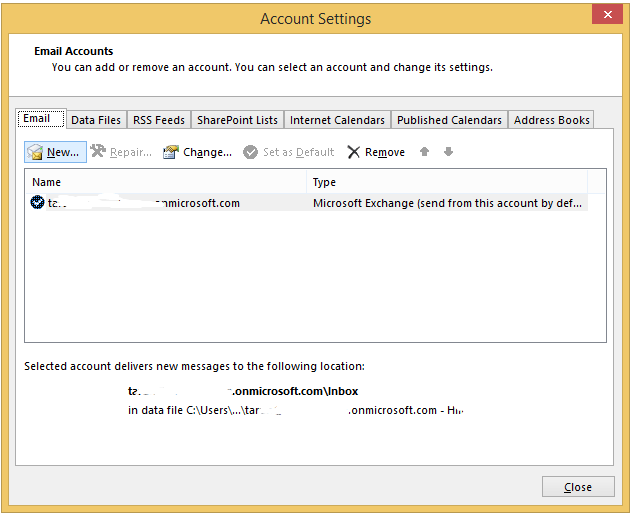
- ‘Account Settings’ wizard will get opened where you need to click on ‘New’ tab. This has been shown in Figure B.
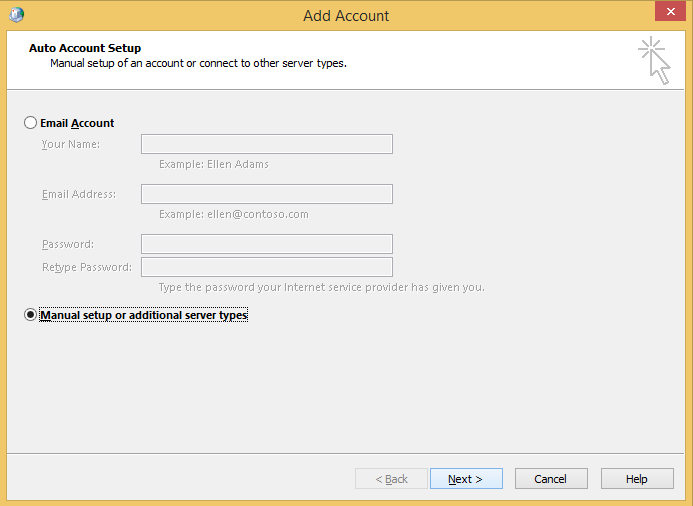
- ‘Add Account’ page will be opened where you can either select ‘Email Account’ and fill details or choose ‘Manual setup or additional server types’. Then click on ‘Next’ button. This has been shown in the Figure C.
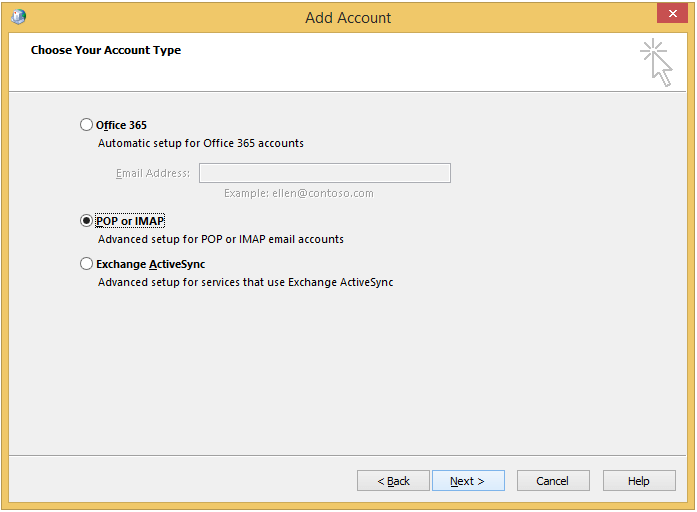
- In the next wizard, choose ‘POP or IMAP’ option and click on ‘Next’ button. This has been shown in the Figure D.
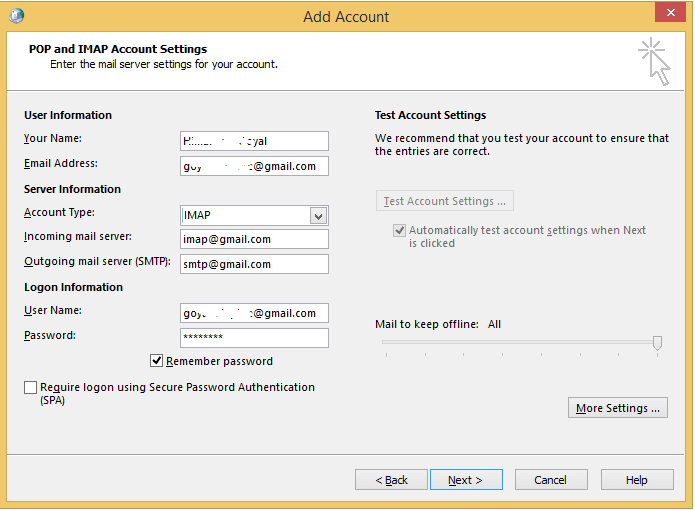
- In the next wizard, enter the user information like your name and email address.
Enter the server information like account type as IMAP, incoming server as imap@onmicrosoft.com, outgoing mail server as smtp@onmicrosoft.com and logon information with username and password. Test Account Settings and once it is done, then click on ‘Next’ button. This has been shown in the Figure E.
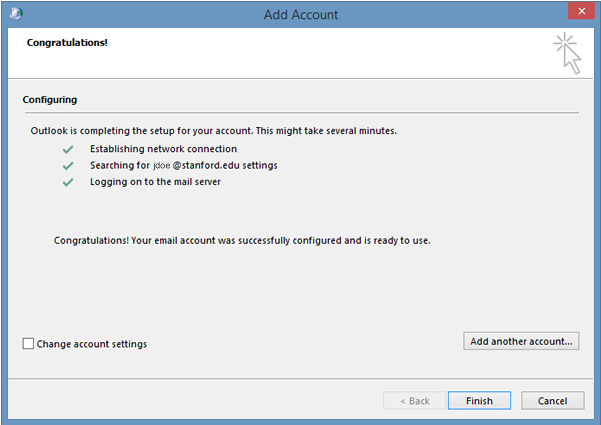
- Now, the configuration would begin and once, it is completed then click on ‘Finish’ button. This has been shown in Figure F.
Step 2:
Import PST files into Office 365 Using Outlook Import/Export Wizard
The following are the steps to import PST files into Office 365 using Import/Export Wizard:
- Open Outlook application and click on ‘File’ tab.
- Select ‘Open & Export’.
- Click on ‘Import/Export’.
- Select ‘Import from another program’.
- Select ‘Outlook Data File (.pst)’.
- Select the PST files that you want to import.
- In the next window, select what you want to import and where. Here the ‘Outlook Data File’ needs to be selected as a file type and email id of Office 365 needs to be selected. In its corresponding drop down arrow, click on it and choose the folder as ‘Inbox’.
- Click on ‘Finish’ button. By doing so, all the PST files would get imported into Office 365 in the particular folder as chosen.
Limitations of Using Manual Method
- It is quite lengthy and time consuming process.
- If the Multi-factor Authentication is enabled then, the user would have to ask ‘Admin’ for app generated password. In case of ‘Without Admin’ impersonation, the user would not be able to configure Office 365 account into Outlook.
- There is a limit on the file size and amount of files to be imported into Office 365
Automated Method to Import PST File
The SysTools Office 365 PST Import tool is a robust and flexible automated method. It allows the user to import multiple PST files into Office 365 in an effortless manner.
The following are the steps to import PST files into Office 365 using Office 365 import tool:
- Install and Launch ‘Office 365 import’ tool as shown in Figure G.
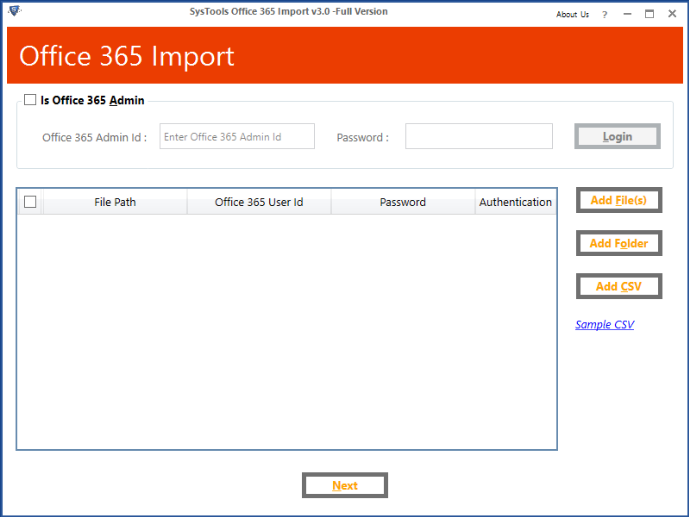
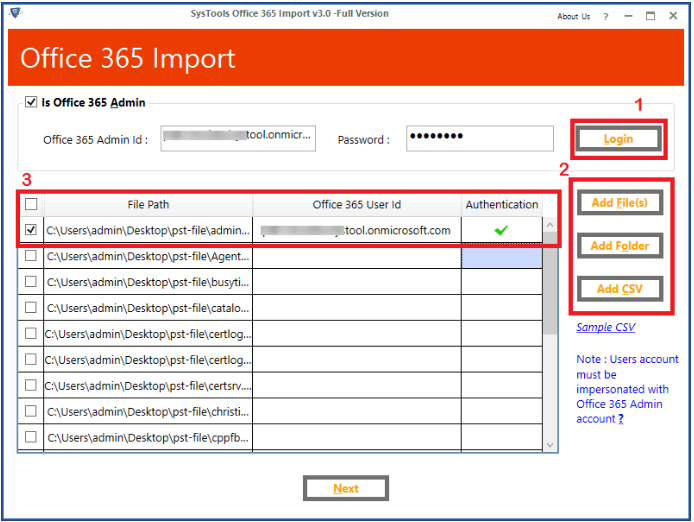
- Login into the software using the admin or without admin user credentials.
It is to be noted that admin credentials helps to import multiple PST files into various Office 365 user accounts. On the other hand, user credentials will help to import PST files only on the particular user email id.
- PST files can be imported using ‘Add File’ or ‘Add Folder’ or ‘Add CSV’ option. In the corresponding file path, enter the email id of Office 365 for import and allow the software to authenticate it. If using admin then multiple PST files can be loaded with respective email ids and if the user credentials are entered then, the respective email id of Office 365 has to be entered. This has been shown in the Figure H.
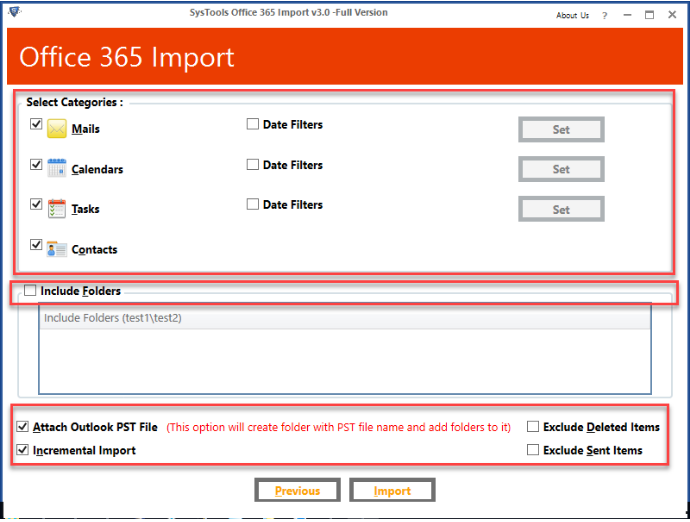
- Select the category which you want to import and apply the date filters. You can mark check on ‘Attach Outlook PST file’ and ‘Incremental Import’. This has been shown in the Figure I.
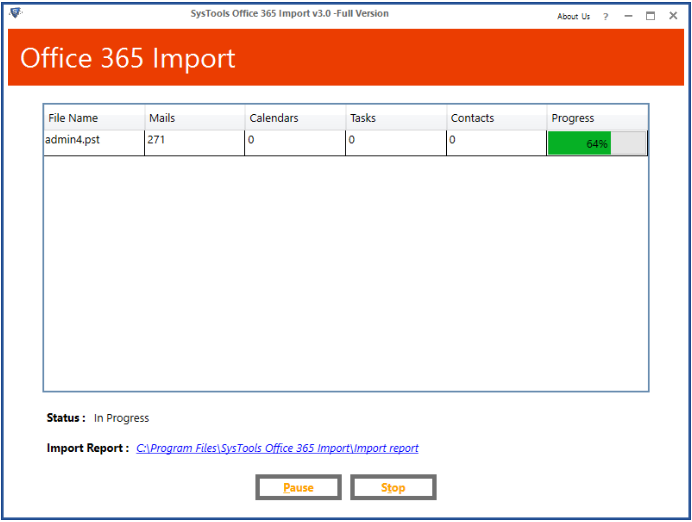
- Click on ‘Import’ button to begin the process. This has been shown in the Figure J.
- Click on ‘OK’ button once the import process is successfully completed.
You can now see the imported PST files into Office 365.
Final Thoughts
In the above blog, the query ‘How to import PST File into Office 365?’ has been discussed. The most preferred solution is by using the automated method where the PST files are imported error free and without any hassles. However, the manual method is a lengthy approach which requires technical expertise to carry out the functions.


