How to do a Clean Installation of a Graphics Card Driver?
With every update and upgrade, operating systems of computers are getting more and more advanced and to keep up with the other companies have to also work hard and develop new technologies and apps which are compatible with them. There are many utilities itself that need to be updated from time to time if you want to work without any hitches. Drivers are an important part of the operating system. No matter if you are working on Windows or Mac, if your drivers are outdated or not properly installed then you can face some really serious issues and problems with your computer like crashing, freezing, BSOD errors, slow bootup, lag in performance, glitches, poor graphics, undetected hardware equipment, etc. Hence, updating graphics drivers is always a good idea to improve the performance of your PC.
This problem is not so prominent in Mac because the operating system update and following patches bring in all the required driver updates and installations, for Windows the story is slightly different and complex. So, in this article, I am going to share with you some simple steps that you can follow to do a clean installation or even a reinstallation of graphics drivers on Windows 10. Have a look:
How to reinstall graphics card drivers in Windows 10?
Windows computers mostly use Intel motherboards which have an inbuilt graphics card also known as integrated graphics. These cards are not removable by nature and hence the drivers are also provided by Intel itself for the users. These inbuilt units are also very necessary for operations as they provide smoothness in basic graphics, videos, animations, transitions, effects, etc. They are also responsible for maintaining graphics on multiple display monitors as well. So if you uninstall this driver or disable this device then you can also face a serious lag in performance.
Update Graphics Card Driver
- Click on the start button in the bottom left corner of your screen and then type “Device Manager”
- Device Manager will appear in the list. Click on it and a new window will appear.
- In this new window, you will see a list of all the devices attached to the system, there will be a lot of names which you may be unaware of but don’t worry about it, they are there.
- Search for Display Adapters in the list.
- Click on the little arrowhead present on the left side of Display Adapters to open the sublist.
- Here you should see the name of all the graphics card installed on your computer.
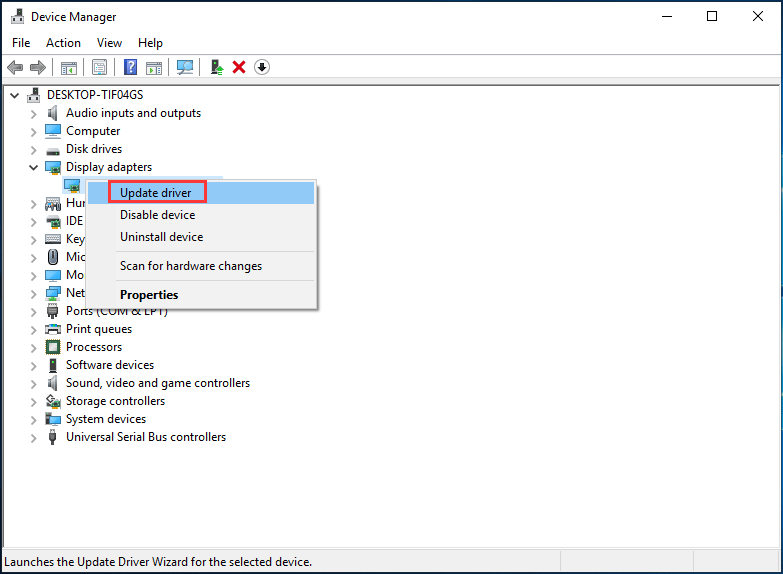
- Right-click on the Intel option. This is the inbuilt graphics card driver that we are trying to update.
- After the right-click a new list will pop out, click on Update Driver.
This will open a new window on your computer and it will give you two options. Either search for the driver online or search for it locally on the computer storage or attached devices.
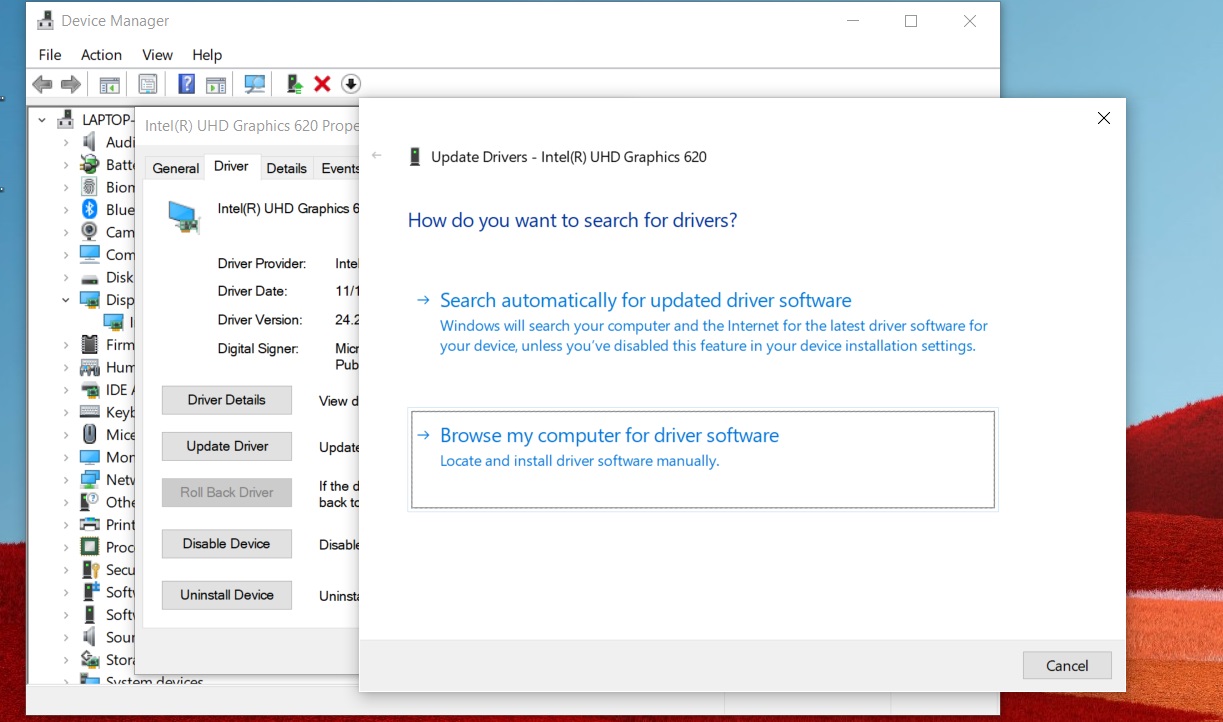
- Click on the first option to search for a driver online.
- Windows will then automatically start searching for the compatible and latest driver to be installed for the particular chipset integrated on your computer’s motherboard.
After the new driver is found, the system will start installing it automatically. All of this process should take a few minutes depending on your system’s speed and internet connection. After the installation is complete you should restart your computer in order to free up the RAM and installation to complete. Your driver will be ready for operation once the system gets rebooted.
If you wish to do a clean installation of drivers on your computer then it will just add a couple more steps in the above-mentioned process.
- When you are in the Display Adapters popup list, click on “Uninstall Device” and the existing driver will be uninstalled. Restart your computer to complete the uninstallation.
- Go to Display Adapters again and then in the popup list, click on Update Driver and follow the same process.
This will clean up all the traces of the old and existing driver and will also ensure that only the new and compatible drivers are installed in the system.
So this was how to reinstall graphics drivers in Windows 10 via simple steps. If you still feel that the process is tough or you don’t want to invest your time in doing all of it then I would suggest you get a third party utility app that can take care of all your driver’s needs in a single click.
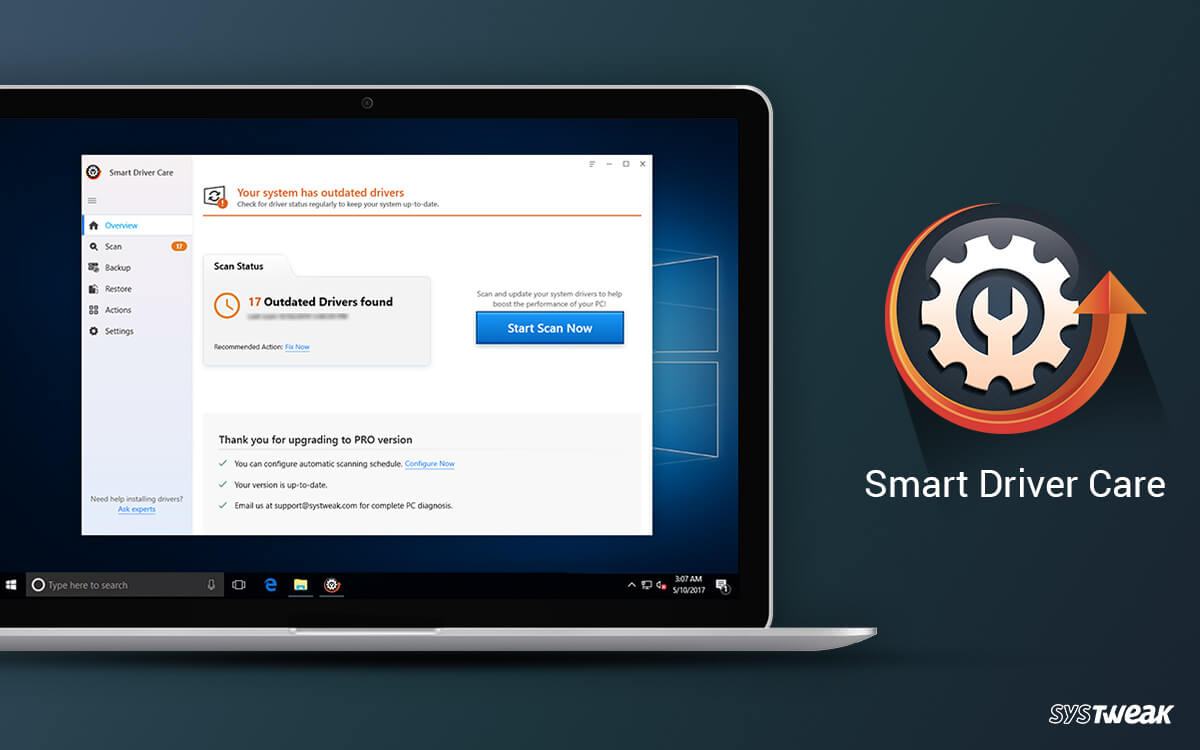
You can check out: Smart Driver Care; one of the best and trusted driver updater tools available for Windows 10 in 2020. It has a huge database of drivers that are regularly updated for maintaining compatibility with different devices and systems. It can perform deep scans and search for incompatible, outdated, and useless drivers that you can remove, update latest and compatible ones, and even take backups of old and existing drivers in case you wish to rollback to them, all within a few clicks.
Hope it helps.
Thanks for reading!