How to disassemble the tablet by yourself
In the 21st century, human life is closely connected with various digital technologies. Even a child can hardly imagine his life without various gadgets. It is the fault of children that computers, game consoles and smartphones break down most often. Many people, for one reason or another, do not want to go to service centers for professional help.
General instructions
The presented instructions are suitable for many tablets. Although they all differ in appearance, in fact there are almost no differences in the disassembly of the device. Information in this article is suitable for owners of gadgets from the following manufacturers: Wexler, Wacom, PiPO, Prestigio Multipad, Digma, Huawei, Chuwi, Teclast, Cube, FNF, Onda, Colorfly, Ainol, Ramos, BQ, Irbis, Explay, Ginzzu, teXet, Vertex, Mystery, Qumo, Dexp, Oysters, Supra, No-name, and is also relevant for such brands as: Apple, Lenovo, Microsoft, Acer, Asus, Sony, Samsung Galaxy Tab.
The whole process consists of several steps:
- Removing the back cover.
- Separating the front panel.
- Removing the battery.
- Working with the display.
- Let’s look at each step in detail.
Before you start disassembling the gadget, remember that your unskilled intervention can permanently damage the device. Careless handling with a tool can damage the contacts, the motherboard, the screen or the main processor of the device. The necessary set of tools for disassembly In order to open any device, you need a set of tools. In the case of repairing a tablet computer It looks as follows.
Required tool kit for disassembly
In order to open any device, you need a set of tools. In the case of repairing a tablet computer It looks as follows.
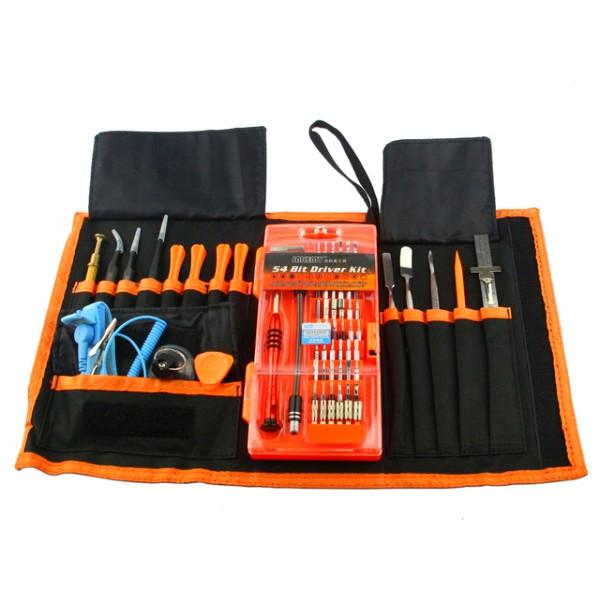
- Special set of shaped screwdrivers. There are screws of different shapes on different devices. Such a set of screwdrivers with a variety of cross-sections will come in handy for repairs.
- A thin knife or plastic spatula. Will help you open tightly adhering elements of the body. You can use a guitar pick.
- Surgical tweezers. Handle where your fingers can’t reach.
- Super glue or duct tape. Many elements are fixed by the manufacturer with duct tape. You will need it after the repair to return everything to its original position.
- You need it when you disconnect the sensor from the matrix, and the protective glass from the frame of the case.
Removing the cover
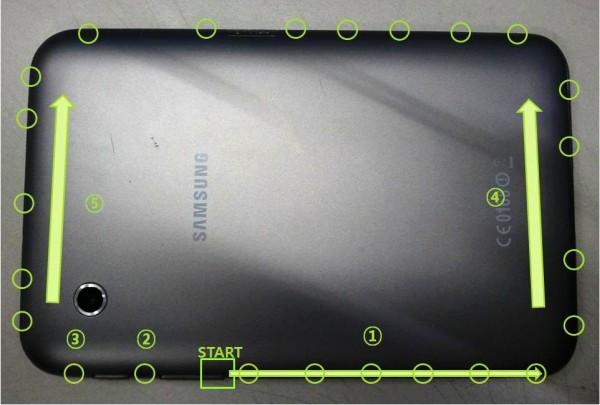
- Carefully read the instructions (either included with the unit or on the Internet).
- Using a plastic spatula, pick, or fine knife, locate the retaining clips. They are located in different places on different models. Try not to damage them. Later it will be difficult to assemble the device back.
- Inspect the case for screws and screws. If there are any, unscrew them with a suitable shaped screwdriver.
Opening the top part
The front part is opened in the same way. It is necessary to unfasten all the latches. Pay attention to the screws inside the tablet when you remove the back cover. Some of them go through and hold the front panel frame. Be very careful not to break the monitor.
Disconnecting loops
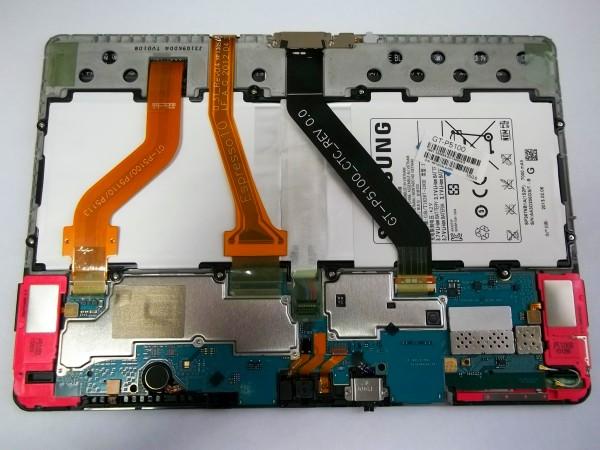
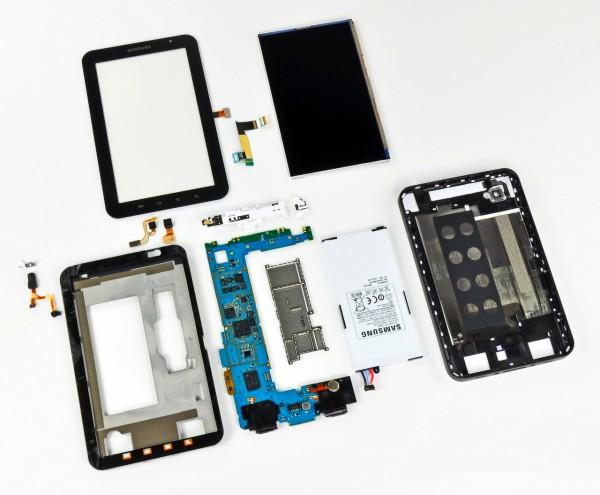
A daisy chain is a flat strip of wires. It has different widths depending on its purpose. As a rule, the widest goes from the motherboard to the display. Narrower loops connect the microphone, speakers, volume control buttons, and battery.
After the plastic case is separated from the main iron, examine the gadget’s insides. Using tweezers, carefully disconnect all the loops.
Be careful! A torn loop is almost impossible to repair. You’ll have to type the address of the nearest radio parts store into your navigator.
Removing the battery
The battery in the “tablets” is built-in and is connected to the device by a loop. It can not be removed as a battery from the phone. In most cases it is attached to the double sided tape, screws or glue base. Use one of the tools in your kit depending on how it is attached. Remove the battery.
Screen work
Here, as never before, “straight hands” are needed. Working with a hair dryer, due to lack of experience, you can completely “kill” the most expensive parts of the tablet: the sensor, the display matrix and the motherboard. Further repair in this case will cost a pretty penny. It is easier to buy a new gadget.
The screen is three elements: the protective glass, the touchscreen, the monitor matrix. To separate the touchscreen from the matrix, heat it with a hair dryer around the edges. The temperature will melt the adhesive and further separation will not be difficult.
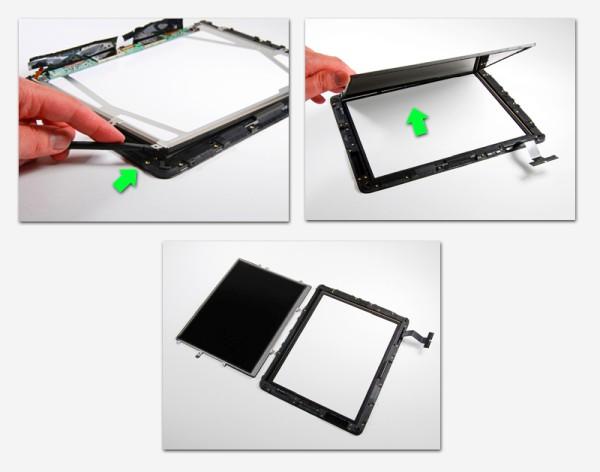
To separate the protective glass from the housing, use a plastic card. Use it to release the clips that are located on the front panel. If in the process some of them fail, double sided tape or a few drops of glue will help us to return the technique to its former appearance.
Conclusion
We have broken down the basic, most important steps in the repair of Android “tablets”. If your device is broken, and you doubt your abilities, it is better to give the device to a repair shop. Thus you get a guarantee for repair and save your nerves.


