How To Enable Biometric Authentication In iPhone Apps?
How To Enable Biometric Authentication In iPhone Apps?
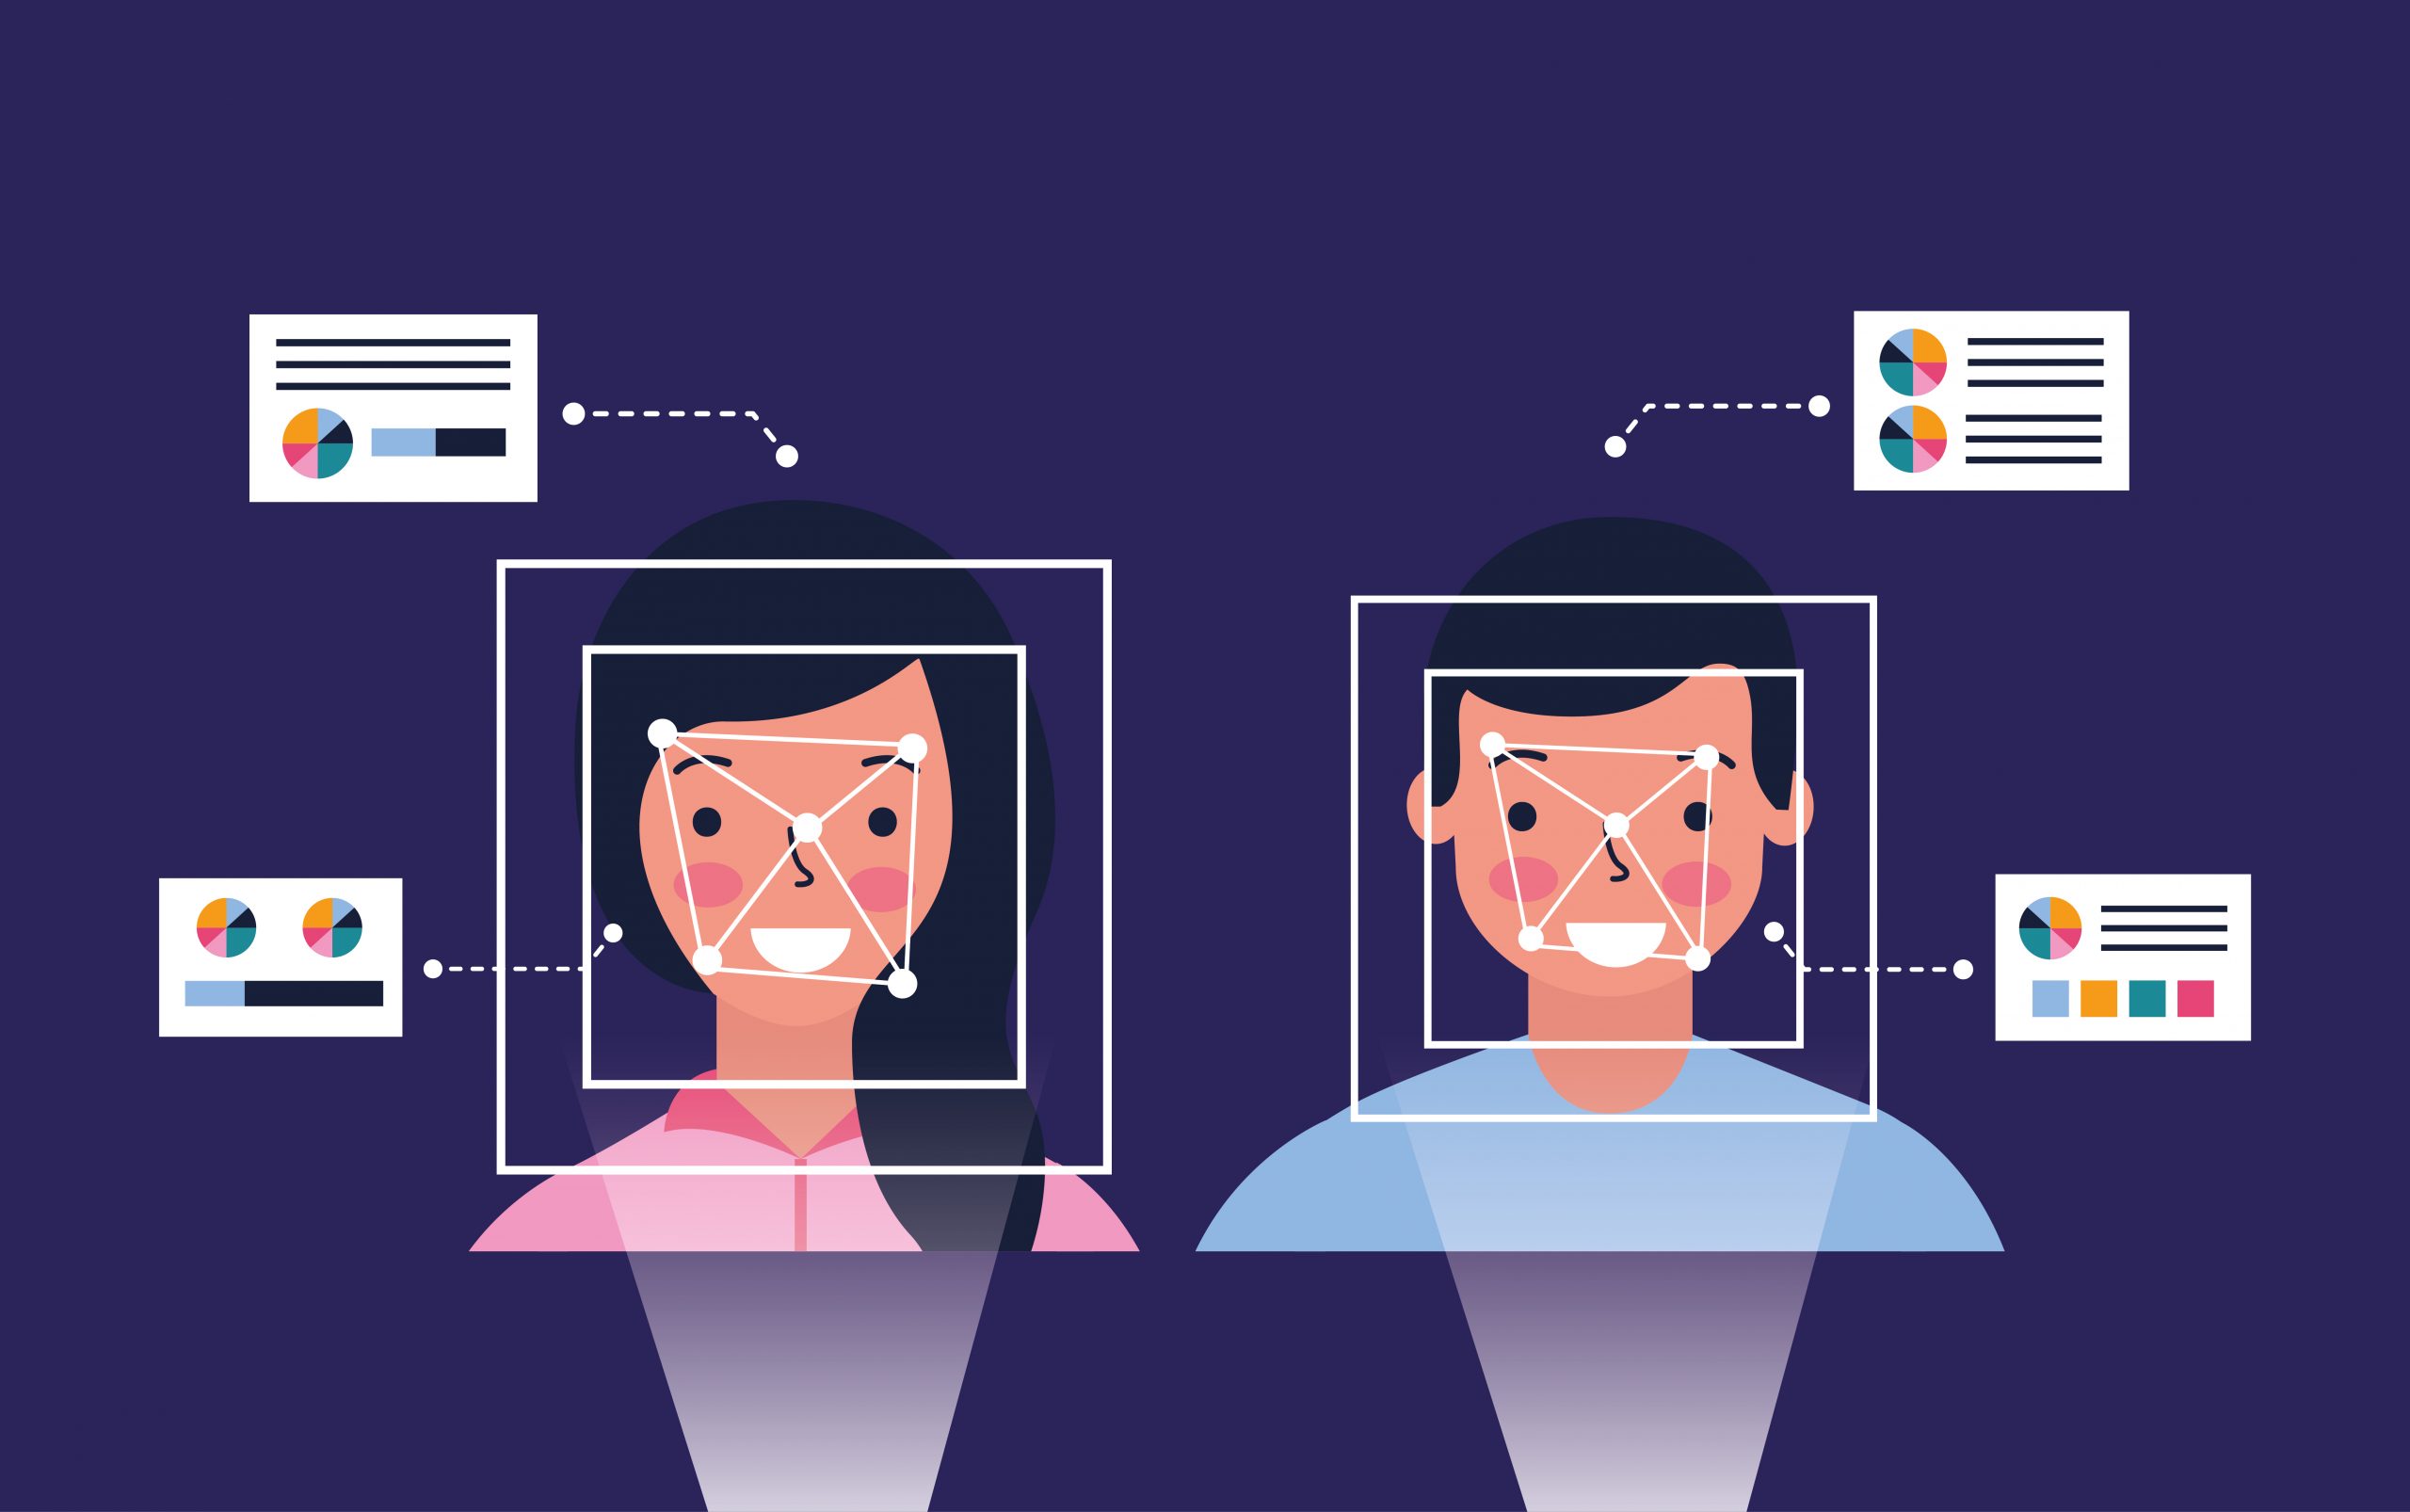
Image Source: https://www.freepik.com/free-vector/man-woman-biometric-process-technology_5597107.htm
Introduction – What is biometric authentication?
Have you ever wondered how your iPhone secures applications with the use of Face or Touch ID? Does it make you inquisitive, how this function operates? Let’s have a look at how your apps can be safeguarded with this novel and valuable technology known as biometric authentication.
Let’s begin by a basic understanding of what biometric authentication is;
Biometric authentication is simply a kind of security that assesses or matches the attributes of a user to verify that the person trying to access, say, a particular device is approved to do so. Aspects such as the bodily and genetic characteristics that are unique to a person and that can be easily compared to authorized features previously saved in the database. If these biometric facets of a user trying to access a device tally with the saved features of an approved user, access to such a device are granted to this user.
Biometric authentication is widely seen in built-in consumer devices, like smartphones or computers. Biometric authentication can be connected with controlling access points too, such as doors and gates to add the security of who is entering your premises. This modern technology is also being used by governments to secure military bases, even seen at airports, and port areas of national borders crossing. It is like a smart security passage for the smart gen’.
Generic types of biometric authentication:
Let’s further see the types, this technology is commonly viewed in;
Fingerprint recognition: Fingerprint scanning or the Touch ID is among the most common and employed biometric technologies for consumers in everyday life. It is based on recording the exclusive patterns of swirls and ridges that form an individual’s fingerprints.
Facial Recognition: Face ID technology is about matching different measurements from an approved face to the face of a user trying to gain access, commonly known as faceprints. Similar to Touch ID, a match with the approved face can grant access.
Certain devices like your personal digital assistant, use superior biometric authentication kinds like Voice Identification or even Retina Scanning. Unlike Face ID or Touch ID, these are not in much use yet. But these are getting upgraded for easy usage in the consumer’s everyday usage patterns.
Biometric technology works best when used correctly by the iPhone app development company. Consistent updates are vital to guarantee that the biometric data and functions continue to work properly. Biometric authentication is a technology that is progressively acquiring acceptance across several industries, mainly that are centered on security and it will continue gaining presence in consumer-grade devices and applications.
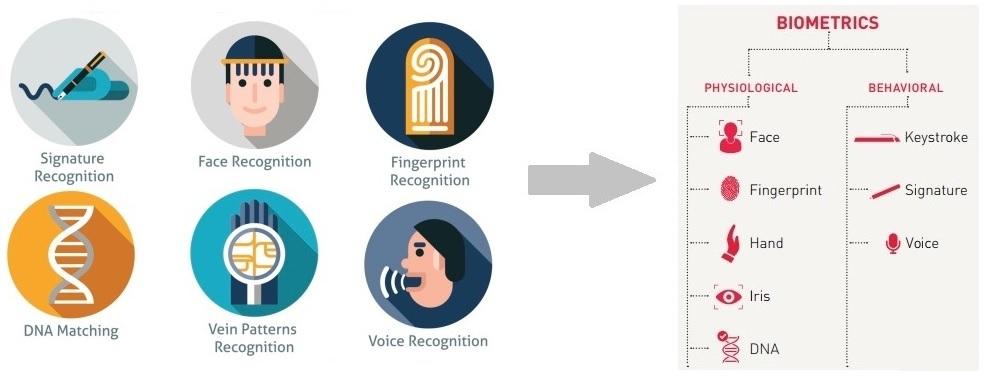
Why is biometric authentication needed?
Biometric authentication came into being, as a simpler alternative to the traditional password security in your smartphone. With the inconvenience of each time remembering a password, even so, with the parameters like character length or special characters, the augment of biometric technology in smartphones was a relief for both the users as well as the developers, who had to include a password reset facet all the time. The old school password setting was easier for hackers to break any phone security and theft of identity too, making it a risky system for mobile payments. Biometric authentication uses the human body itself as the password. It has transformed the long & complex password to authentication of self.
With further advances in technology, smartphones will be furnished with robust biometric that make authentication trouble-free and more reliable. Soon, the biometric will add in features like vein matching or even ear recognition under its tab.
Having seen what the technology is and why it is needed, let’s throw some light on how it works.
How to enable biometric authentication on your iPhone? As a user:
As well known, Apple introduced biometric authentication in the form of Touch ID for iOS devices back in 2013. Let’s see how the setup is done on an iPhone, step by step;
For Touch ID
- Go to the Settings app on your iPhone.
- Scroll down & click the Touch ID & Passcode selection.
- If you have a passcode or PIN set on your iOS device, you will be asked to enter it.
If you don’t currently have a passcode, then you have to create a new passcode before you can set up Touch ID.
You can do this by opening Settings, go to Passcode. Click on Turn Passcode On. It will prompt you to enter a six-digit passcode. Enter your desired passcode and again confirm it. Then activate it.
- Now, click on the Turn Passcode On option to proceed.
- Next, click on Add a Fingerprint. The device will now ask you to rest your finger on the Home Button and lift it back as it tinkles.
- Continue the procedure of lifting and resting your finger, so that your fingerprint is read by the Touch ID hardware system.
- Once this is complete, the next step is to Adjust Your Grip. This helps to read the outer edges of your fingers so that the device gets the full reading of your fingerprint accurately.
- Once this is done, your fingerprint is now recorded on your iPhone.
You can now simply unlock your iPhone, using the fingerprint you just set up.
Let’s also have a look at how you can use this Touch ID feature to make online purchases from your iPhone; How to Enable Purchases using Touch ID on iPhone;
After having set up Touch ID on your iOS device, you can easily make purchases on the App Store, iTunes Store, Apple Books, and so on, by using the Touch ID. Here’s how;
- Open the Settings app on your iPhone
- Scroll down and got to the Touch ID & Passcode option
- Enable the iTunes & App Store control. You will need to sign in to your iTunes or App Store account to do this.
- Now, and whenever you try to buy or even download something on the App Store or iTunes Store, your device will ask you to pay with Touch ID.
As simple as that!
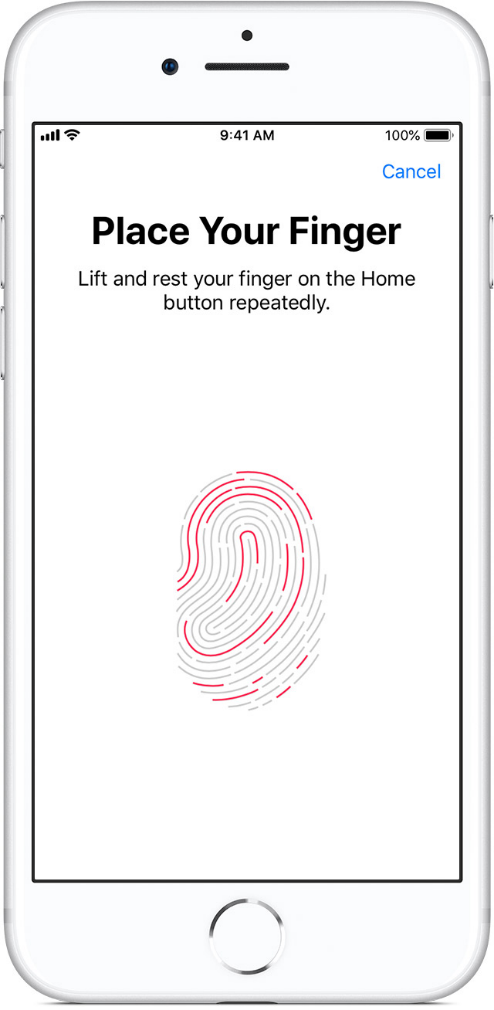
Similar to Touch ID, let’s see the setting for enabling Face ID for your iPhone;
For Face ID:
- Open the Settings app on your iPhone
- Click on the Face ID & Passcode selection. As asked, enter your device passcode to continue.
If you don’t currently have a passcode, then you have to create a new passcode before you can set up Face ID.
You can do this by opening Settings, go to Passcode. Click at Turn Passcode On. It will prompt you to enter a six-digit passcode. Enter your desired passcode, and again to confirm it. Then activate it.
- Now, click on the Turn Passcode On option to proceed.
- Next, click on Set Up Face ID.
- Now, hold your device upright in the Portrait orientation, in front of your face. It needs to be about 10-20 inches away, to get it done accurately.
- Click on Get Started to proceed on.
- Here, carefully place your face inside the circular frame preview for the position. And slowly move your head in a circular motion to complete the circle.
- Once you have finished the scan, click on Continue.
- Repeat the instructions followed for final authorization.
- Once completed, click on Done.
Just like Touch ID, you can utilize Face ID for making purchases on the App Store, iTunes Store, Apple Books, and so on. Follow these simple steps;
- Open the Settings app on your iPhone.
- Click on the Face ID & Passcode selection. Enter your device passcode to continue.
- In the list, look for USE FACE ID FOR, enable the switch for iTunes & App Store, Apple Pay, and Password Autofill.
- Next, enter your App Store password to confirm.
- Now, while making any purchase, simply double-click the sleep or wake button at the side of the iPhone and it will authenticate your purchase using Face ID with ease.
There are situations when Face ID or Touch ID can be turned off automatically. Like, if left unused for 48 hours, or rebooting your device, or even if your passcode has not been used to unlock in six days in such cases, you will need to enter your passcode or password to re-activate it.
Supplement your app with biometric authentication. For a user:
As an app development company, complementing your authentication scheme with biometric authentication makes it convenient and safe for users to access sensitive parts of your app. Users enjoy Touch and Face ID as these mechanisms let them access their devices securely and with minimal effort. As you adopt the Local Authentication framework, you streamline the authentication experience for your user. Let’s have a look at how you can set it up as an iOS app development;
For any project that uses biometric, use the NSFaceIDUsageDescription key in your app’s Info.plist file. Without this key, the system won’t allow your app to use the authentication measures. The value for this key is a string that the system presents to the user the first time your app attempts to use the biometric authentication. The string needs to clearly explain why your app requires access to this authentication mechanism.
Next, accomplish biometric authentication in your app using a LAContext instance, which negotiates interaction between your app and the Secure Enclave. Start by creating a context like;
var context = LAContext()
You can also customize the messaging used by the context to lead your user through the flow. For instance, you can set a custom message for the Cancel button that appears in various alert views, like;
context.localizedCancelTitle = “Enter Username/Password”
This will help your user understand that when they click on the button, they will be reverting to your normal authentication procedure.
Next, before attempting to authenticate, make sure to test that you actually have the ability to do so by calling the canEvaluatePolicy(_:error:) method, like;
var error: NSError?if context.canEvaluatePolicy(.deviceOwnerAuthentication, error: &error) {
You choose a value from the LAPolicy list for which to test. The policy will control how the authentication shall behave. For instance, the LAPolicy.deviceOwnerAuthentication policy may indicate that reverting to a passcode is permitted when biometrics fails or is unavailable. Alternatively, it can indicate the LAPolicy.deviceOwnerAuthenticationWithBiometrics policy, that does not allow reverting to the device passcode.
So, as you are ready to authenticate, call the evaluatePolicy(_:localizedReason:reply:) method, with the same policy you already tested, like;
let reason = “Log in to your account”context.evaluatePolicy(.deviceOwnerAuthentication, localizedReason: reason ) { success, error in
if success {
// Move to the main thread because a state update triggers UI changes. DispatchQueue.main.async { [unowned self] in self.state = .loggedin }
} else { print(error?.localizedDescription ?? “Failed to authenticate”)
// Fall back to asking for username and password. // … }}
For Touch ID, the system will display the reason for authenticating that is provided by you in the method call. So, it is crucial to deliver a clear explanation that is localized for any regions in which you operate, or why your app is asking the user to authenticate. Remember, the name of your app will already appear before the reason you give, so you don’t need to include that in your message.
In the case of Face ID, an important difference from Touch ID is as your app tries to use Touch ID, a system message asks the user to present a finger to scan. Here, the user has the time to think about and possibly abort the operation. Which can be done by canceling the prompt. In the case of Face ID, however, the device begins scanning the user’s face right away. Users don’t get an opportunity to cancel the operation. To accommodate this difference, a different UI needs to be provided, depending on the kind of biometrics available on the device.
You can test the kind of biometry the device supports by reading the context’s biometryType parameter, like;
faceIDLabel.isHidden = (state == .loggedin) || (context.biometryType != .faceID)
This parameter only becomes meaningful after you run the canEvaluatePolicy(_:error:) method on the context at least once.
Now, if the user’s device does not have biometric authentication or the user cancels the operation and for various reasons, the authentication can fail or is unavailable. In a real app, if you encounter a local authentication error, fall back to your traditional authentication scheme, like asking for a username and password. Always employ biometric as a supplement rather than depending on it as your only authentication option.
Key indicators – to keep in mind:
The Apple iPhone security architecture looks like this;
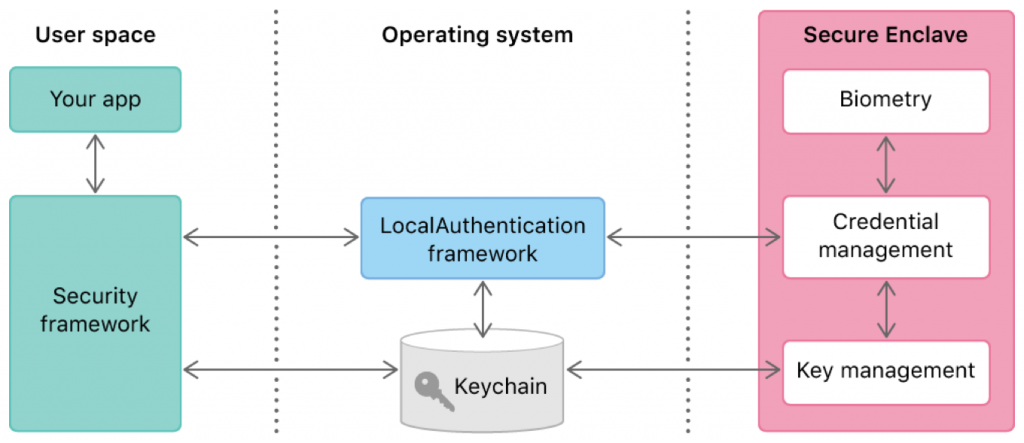
While using Touch or Face ID for authentication, the sensor on the iPhone scans the fingerprint or face and sends the image data to the secure system called the Secure Enclave, for authentication directly without sending through the iOS operating system. Then, this Secure Enclave sends the authentication outcome to the app via the iOS operating system. This entire process takes place in the connected hardware circuit. So, it becomes impractical for the app to obtain any fingerprint or face data.
Additionally, to improve the security of the iPhone, Apple pairs the sensor chip with the security chip inside the iPhone in the production process itself. This way it is impossible to access data in the Secure Enclave either like, by replacing the sensor chip or so. The replaced Home button too cannot be paired with the initial Secure Enclave. Making it incredibly secure and smart.
Conclusion:
It is no longer a surprise that biometric technology is becoming the most popular method of authentication, thanks largely to Apple and its devices. As everything has moved online, establishing trust digitally has become crucial. With such a digital authentication chain, the security level, as well as the trust, grows for the users. The role of biometric authentication is increasing as it provides advanced levels of identity assurance, customer experience, and data protection.
Author Bio: I am Pratik Kanada, founder & CEO of 360 Degree Technosoft, which makes app ideas into reality by providing unique design and development services. I generally write blogs on mobile technology, app development, and app marketing, and trending technologies like AI, ML, IoT, AR, VR, and others.

