How are Push Notifications Added to iOS and Android Application?
Gone are those days when you have to rely on SMSs and emails to reach the audience. These days push notifications are in trend. It doesn’t matter whether your audience is on the Android platform or iOS platform, you can target them easily and instantly through React Native Push Notifications.
All you need to do is add push notifications to iOS and Android mobile applications and you are one step closer to boost your marketing.
But how to add push notifications to mobile apps is a difficult task for many, which is simplified here.
Prerequisites
- NodeJS, v8.3, or ulterior.
- React Native
react-native-cli >= 2.0.0
react-native >= 0.59.0
- For Android: emulator with installed and updated Google play services, firebase account, android studio.
- For iOS: Xcode, iOS device, iOS push certificate.
Note: expo users are required to eject the app. For this go to the project’s folder and run “expo eject”
Step 1: Create a project
- Click on the “new project”
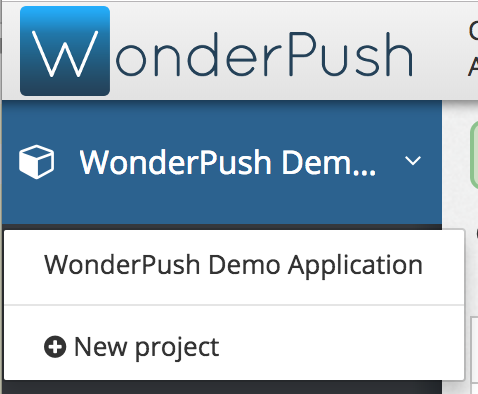
- Fill Name and select the platform.
- Click on “Create”.
Step 2: Setup Push credentials
Android
- Add firebase credentials
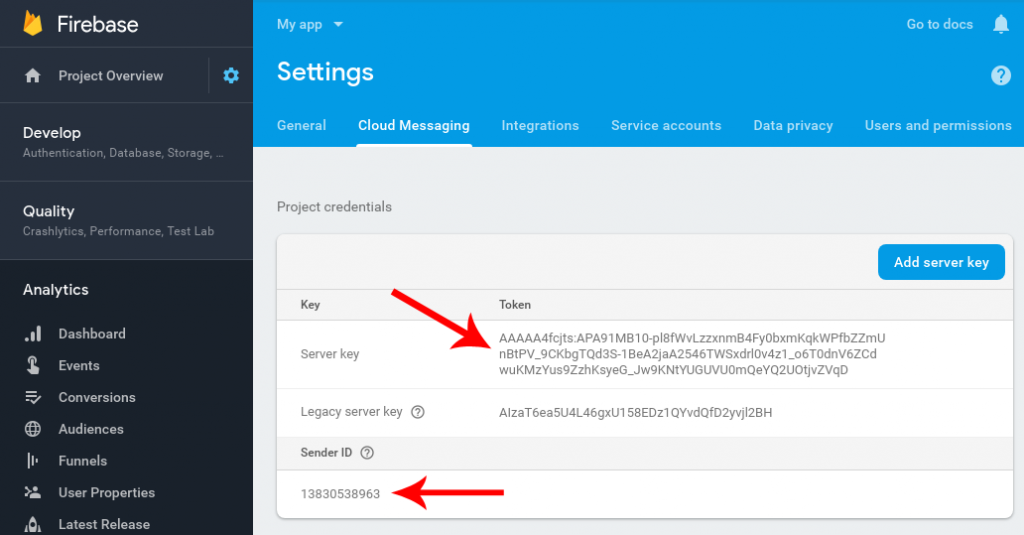
- You need to find your “server key” and “sender ID”. You can do this by clicking the Settings icon followed by “Project settings” and further by clicking on the “cloud messaging tab”.
Image Name: how-are-push-notifications-added-to-iOS-and-android-application-3.jpg
Image Alt: select “cloud messaging tab”
- Go to the service provider’s dashboard on the settings page and click on“Platforms” followed by the “Android application”.
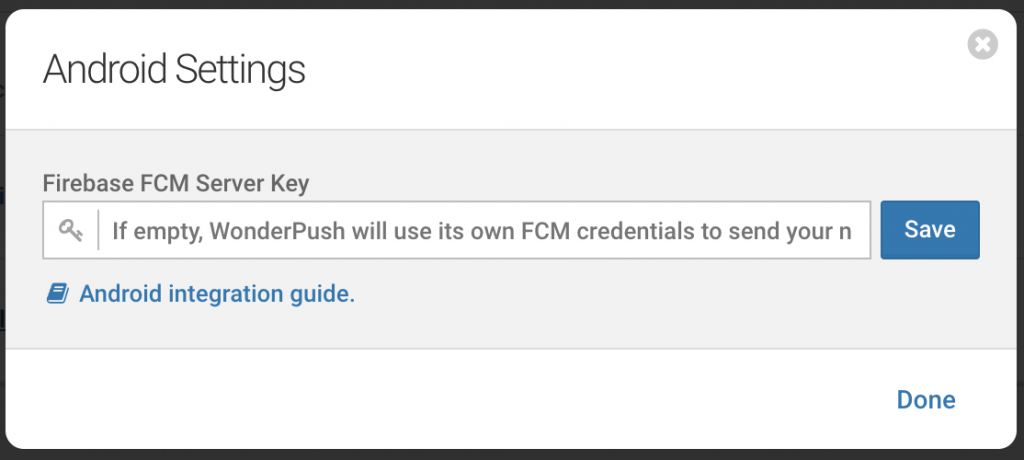
- Place the server key and click on “Save”.
iOS
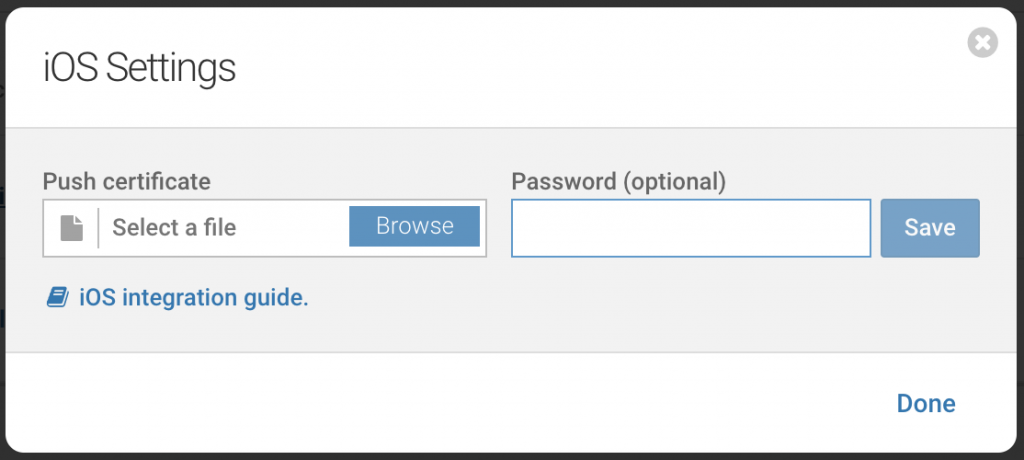
- For iOS, you have to upload a push certificate.
- For this first, go to settings and then click on the “iOS application”.
- Now select a file from the “Browse” option and fill in your push certificate.
Step 3: Add Software Development Kit (SDK)
- Create your React Native application.
- Add React Native SDK, you got from the service provider.
npm install react-native-wonderpush –save
- Link the React Native SDK.
react-native link react-native-wonderpush
iOS
- Open xcworkspace file of the project in Xcode
open ios/*.xcworkspace
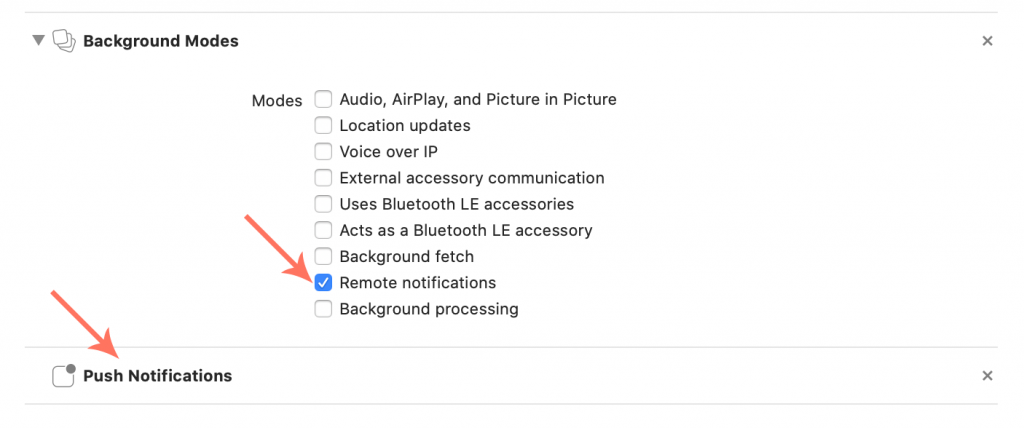
- Add device capabilities by selecting the app’s main target followed by a click on “+ Capability” under “Signing and Capabilities”.
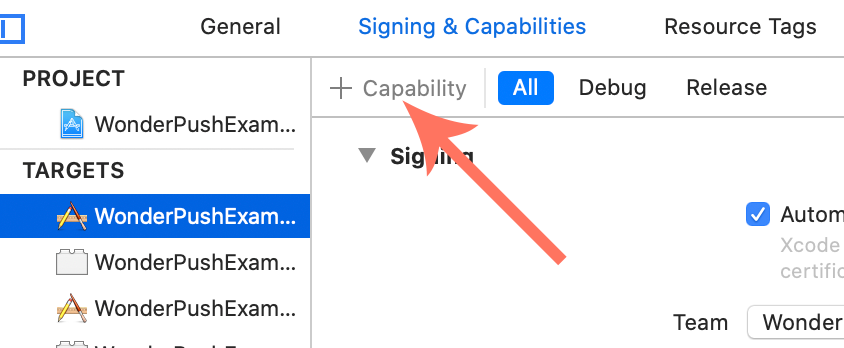
- Add both “Background Modes” and “Push Notifications”.

- Select “Remote Notifications”.
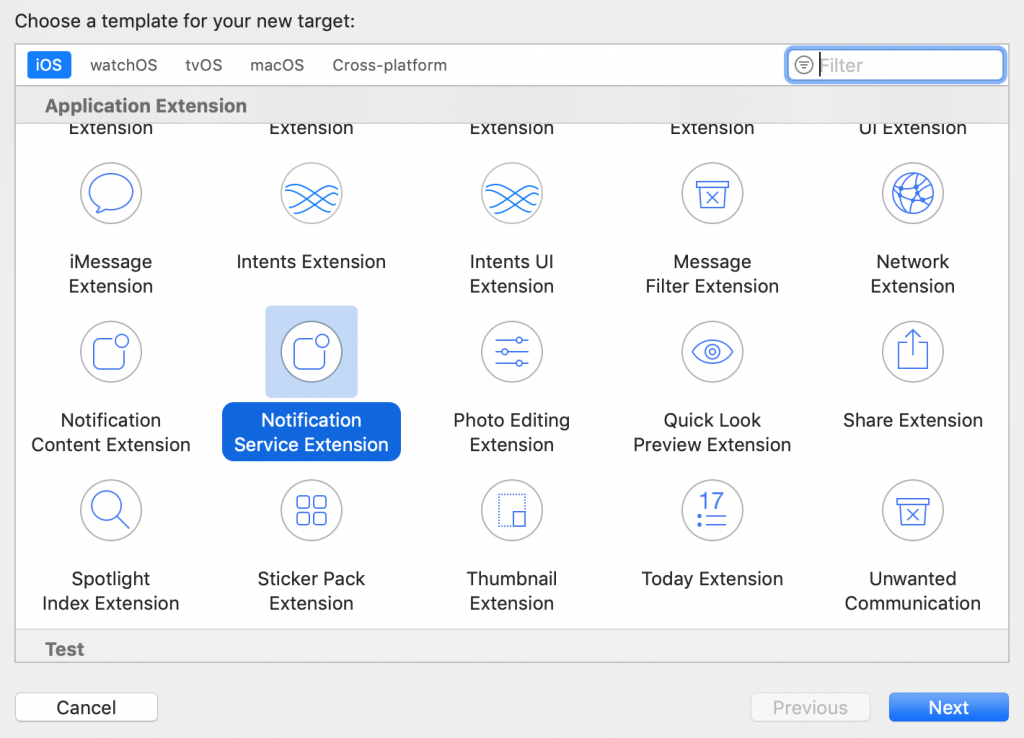
- Go to Xcode and create a “Notification Service Extension”.
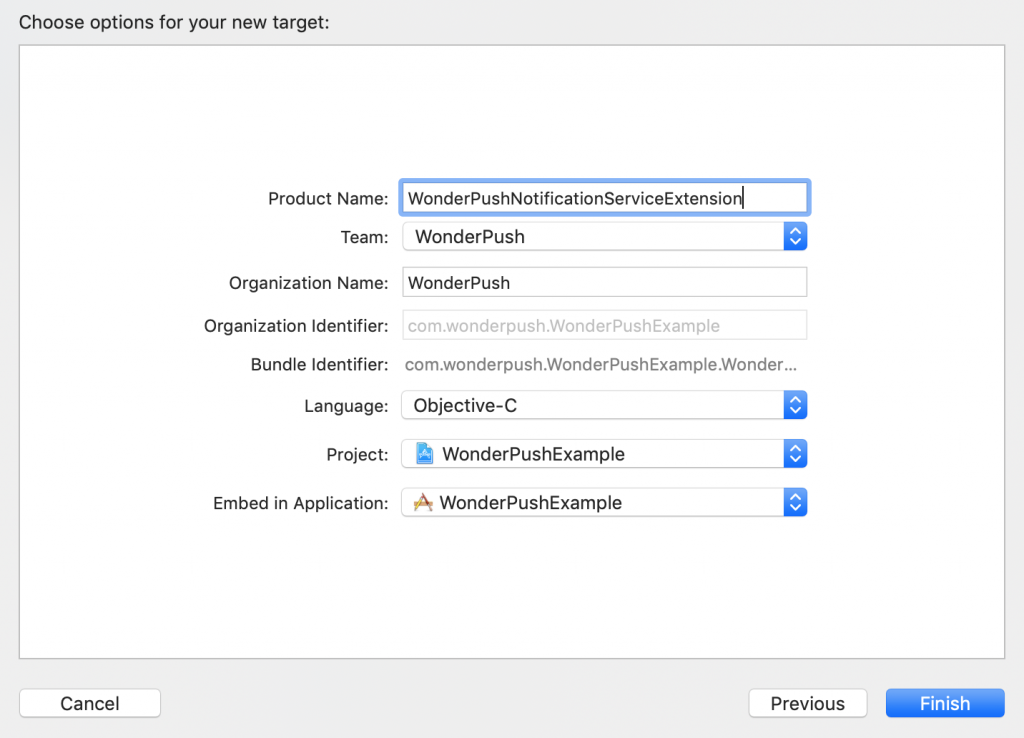
- Now enter “WonderPushNotificationServiceExtension” in the box next to Product Name.
- Xcode will prompt to activate a new scheme. You have to click on “Cancel”.

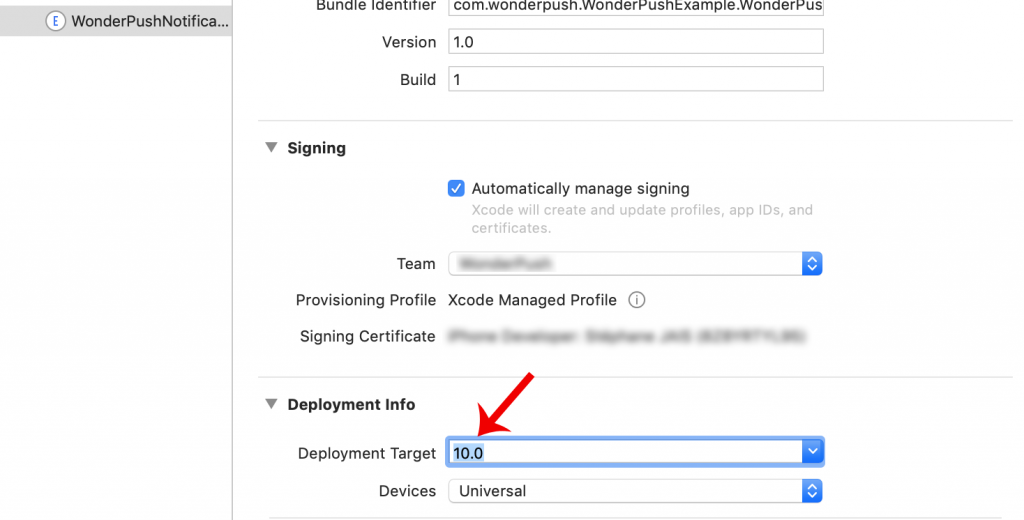
- Now set the “Deployment Target” of Notification Service Extension to 0.
- Finally, edit the ios/Podfile and add the following code at the bottom.
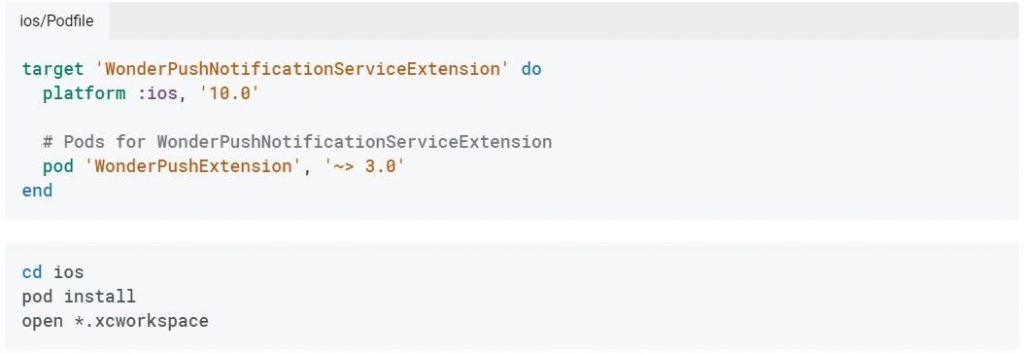
Step 4: Add the required code
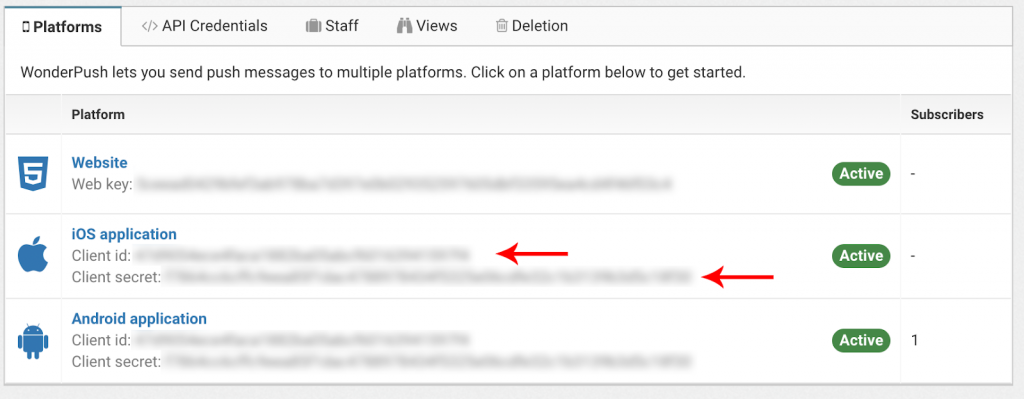
Go to the settings page and click on the “Platforms” tab to take note of both Client ID and Client Secret.
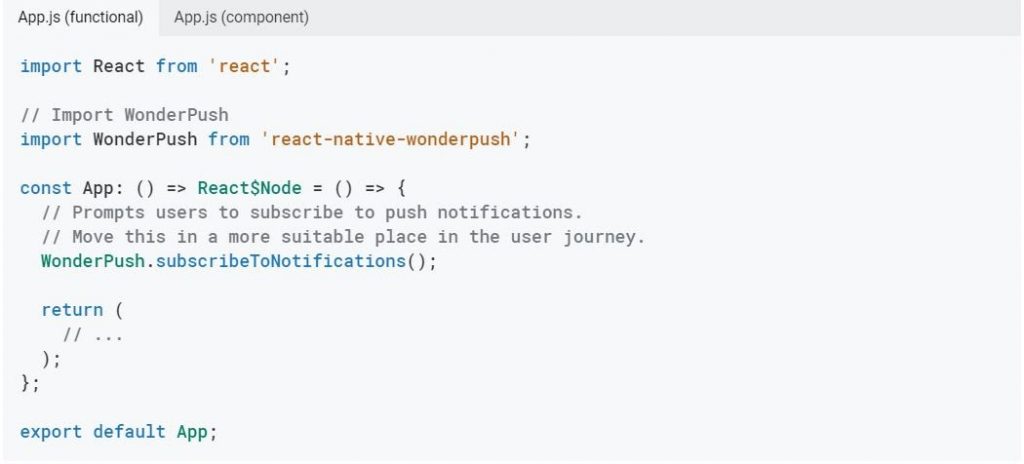
Now add the code that will prompt users to subscribe to your service.
Android
- Go to the android studio to configure android SDK from the android/app/build.gradle

- Replace YOUR_CLIENT_ID and YOUR_CLIENT_SECRET with values that you found on the “Settings” page.
- Replace YOUR_SENDER_ID with the firebase sender ID as presented in step 2.
- Finally, click “Sync Now” and start building a project.
iOS
- Go to AppDelegate to add code and adapt YOUR_CLIENT_ID and YOUR_CLIENT_SECRET with values, as noted before.

- Now the Notification Service Extension code generated in step 3 will be modified by your service provider.
- Now replace the content of swift with the content provided below.

Use Xcode or Android Studio to build and run an application and get the permission prompt.

Now, wait until you receive a default welcome notification from your service provider.

Conclusion: People love to buy online through Mobile phones. Mobile apps are one such place that allows them the freedom to purchase or use products or services whenever and wherever they want. They are effective marketing tools too. You can send push notifications to your users anytime you want to build a solid relationship and increase sales. This will help you grow your business rapidly.
Author Bio: Wonderpush, provides you with React Native push notification services at an economical price. It let you boost your marketing campaign by adding push notifications to both iOS and Android Applications.
APPROVED


