Microsoft Windows operating system used to be preloaded with a few gadgets on the Windows desktop screen however these gadgets were removed with the first version of Windows 8. If you wish to get back those fancy widgets on Windows 10, this article is for you.
There are third-party tools that can be useful to add those productive widgets to your Windows 10 or Windows 11 desktop. You can add gadgets like clocks, calendars, news feeds, photos, system monitors, and more to the desktop screen. You can position these mini-apps in the right-hand side bottom and they are designed in such a manner that they hide behind your main apps.
Why Microsoft Removed these Widgets?
These widgets were dropped off due to security reasons. Microsoft opted out of these widgets due to vulnerabilities in the gadgets. These gadgets were prone to remote attacks and could allow remote access to your device without your permission. Though Microsoft released a fix to disable codes and auto-run features however with the release of Windows 8, these gadgets were removed.
These gadgets were found malicious while others were not legitimate. Another reason for the removal was the launch of the Tile feature. Microsoft made it incredibly simple to access all frequent apps with small tiles on the start menu.
How to Add Windows 10 Desktop Widgets
There is only one manual method to add Windows widgets that are preloaded on the Windows 10 operating system. You can add System Performance Monitor, or Resources / Task Manager to keep an eye on the actively running tasks and the impact on CPU/GPU/RAM. If you wish to add additional Gadgets/Widgets you will need to take the help of third-party software.
Add Gadgets Using Gaming Bar
Gaming Bar has a few options that are useful while playing games. You can constantly check your system performance and the resources used.
Step 1. Press (Win + G) to launch the gaming bar. You can Add, Open, Pin, or Unpin Widgets on the gaming bar. If you pin a particular window, it will remain on the screen until you come back to the same window and unpin the widget. The Pinned widget will remain on the top of all the applications that are open.
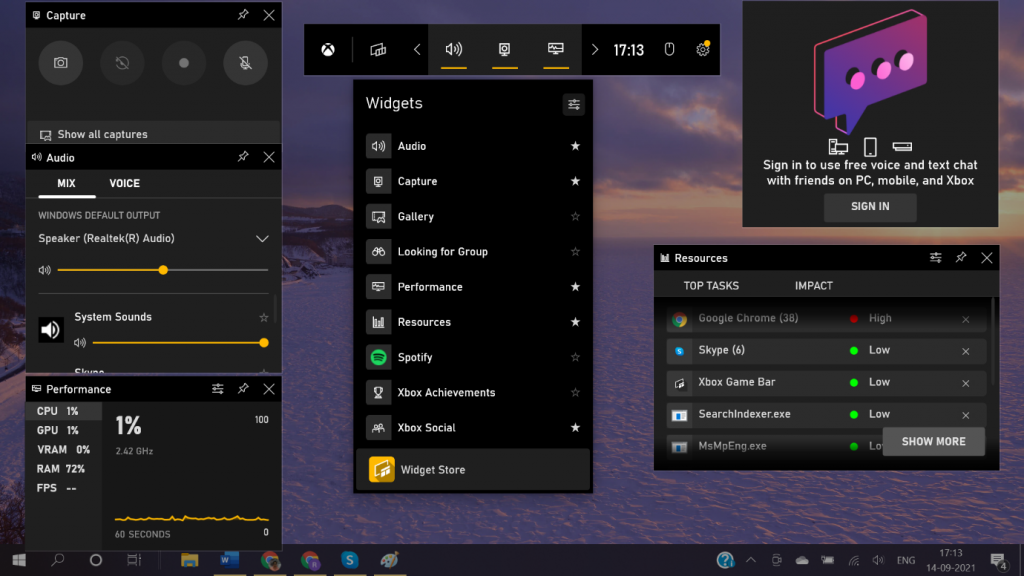
The Gaming Bar is bifurcated into different sections like Audio, Capture, Gallery, Performance, Resources, Spotify, Xbox Social and the Widget store. Add more widgets from the Widget store or pin the existing Widgets.
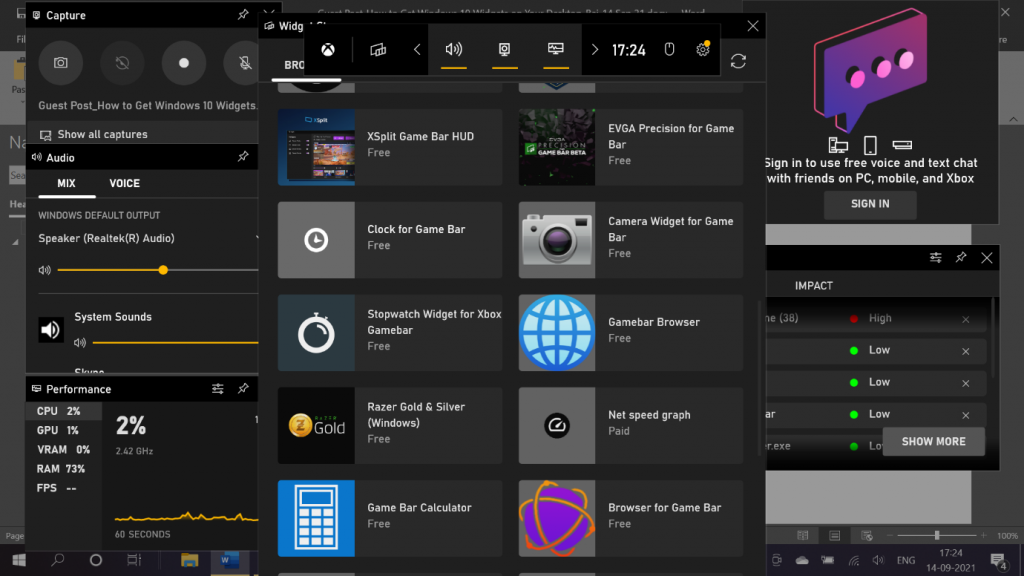
You can move the Widget section anywhere on the screen however not all widgets can be resized. When you try to add more widgets, it shows you Widget options that are related to gaming. You can simply select and install the widget and pin it on your desktop screen.
If you ever encounter a problem with the gadgets or any of the widgets, you can troubleshoot the issue. Fix widget not working issue with these steps on Windows 10 or Windows 11.
Download 8GadgetPack
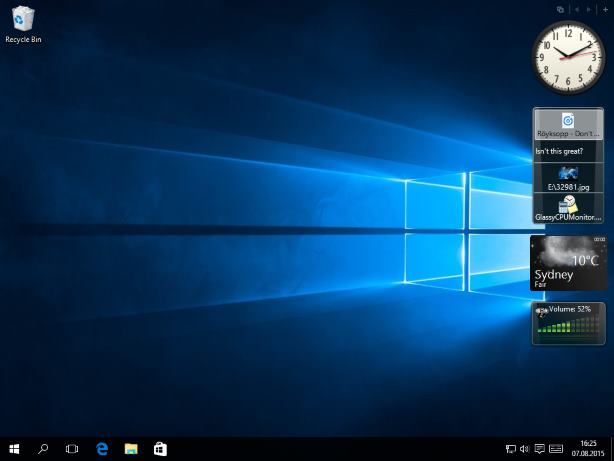
Adding third-party gadgets is easier than managing the Gaming Bar. You can easily download 8GadgetPack from its official website. There are dozens of inbuilt gadgets included in this single pack that can allow you to add numerous gadgets to your desktop screen.
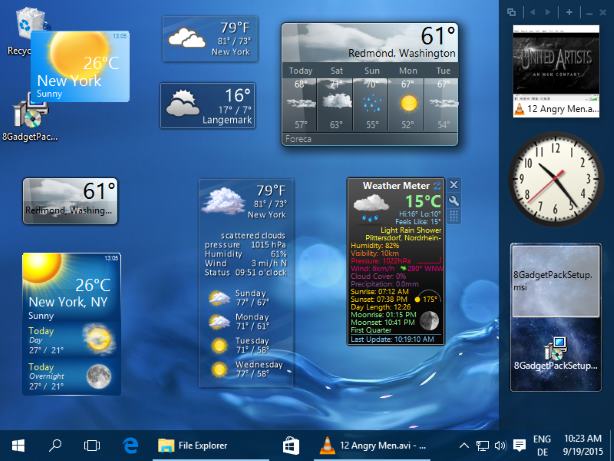
When you download the pack, simply run the installation wizard and follow on-screen instructions. Customize the settings according to your preferences to show, hide, scroll, popup or down the gadgets bar. All these gadgets can be synced with your date, time, location, and regional settings.
Download Desktop Gadgets from Microsoft Store
Microsoft Store is one of the trusted marketplaces from where you can download and install your gadgets. Here is how you can get Widgets on Windows 10.
Step 1. Press the Window key and type Store in the Search Bar.
Step 2. Click on the Microsoft Store App from the search results.
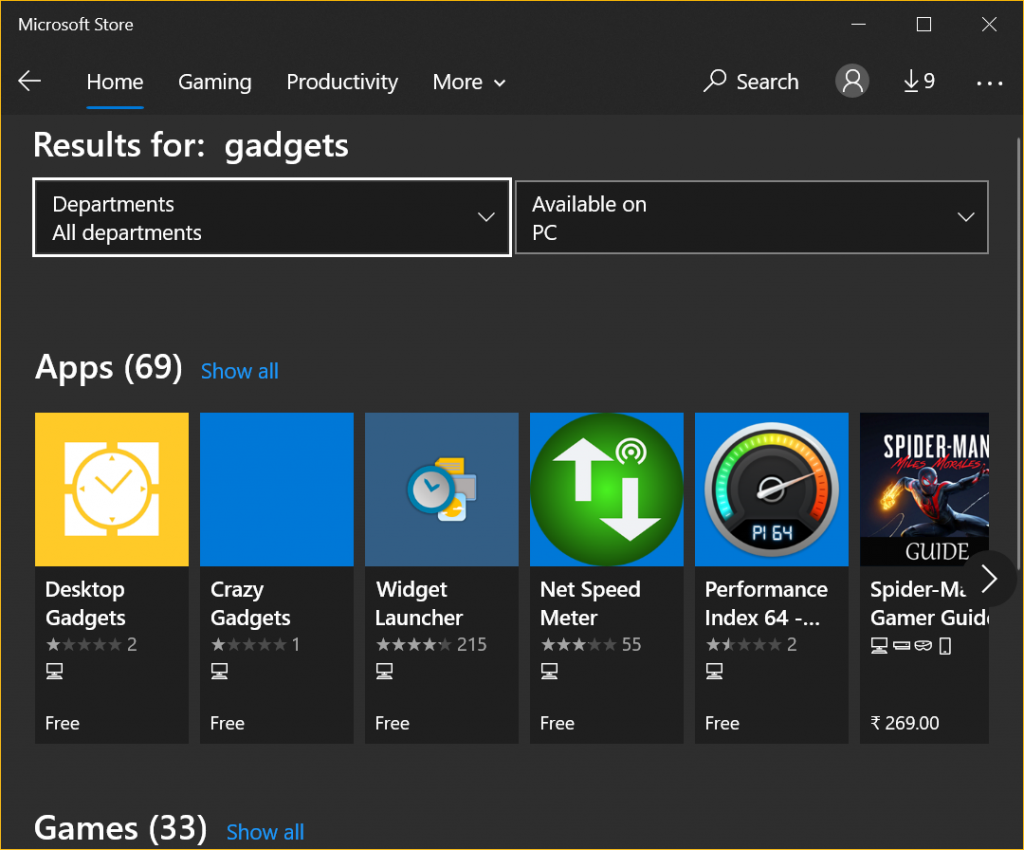
Step 3. Click on the Search Bar on the top right, type Gadgets and hit the Enter key.
Step 4. Click on Show All link in front of Apps to expand the list of available gadgets.
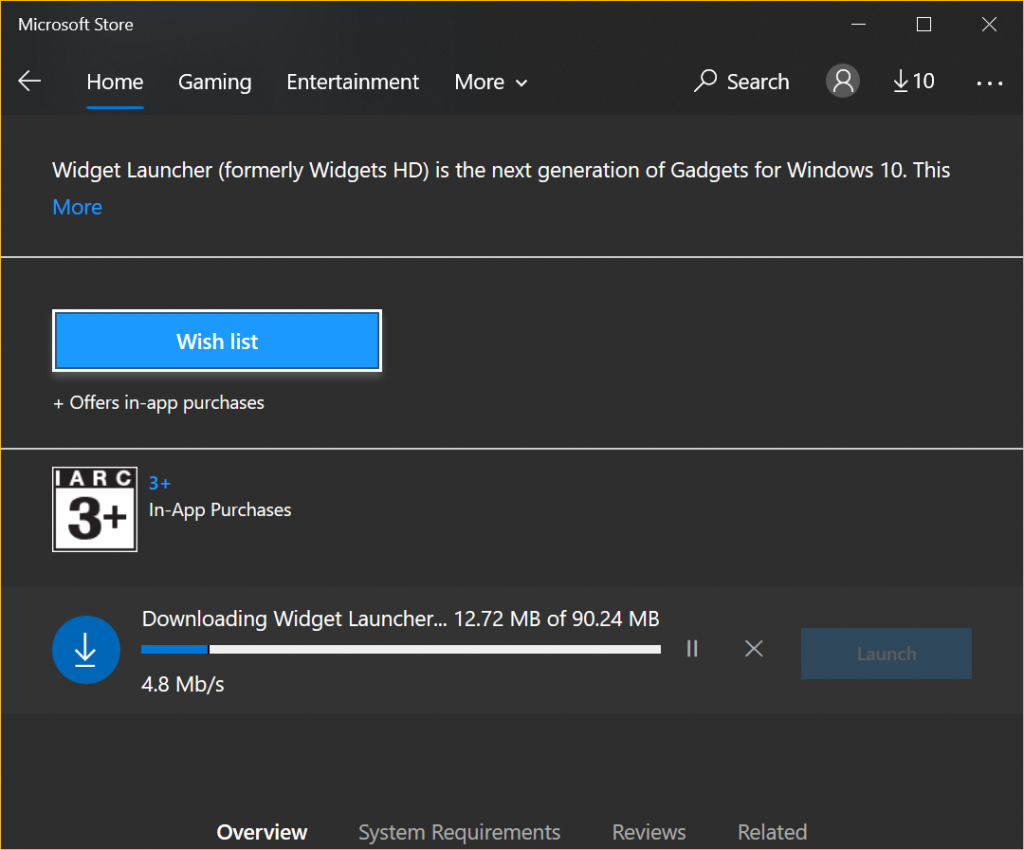
Step 5. It will list out all the free and paid gadgets. If you found the desired widget, click on it and scroll down the list. Click on the Get button. It will download and install the gadget on your computer and notify you once the download/installation is complete.
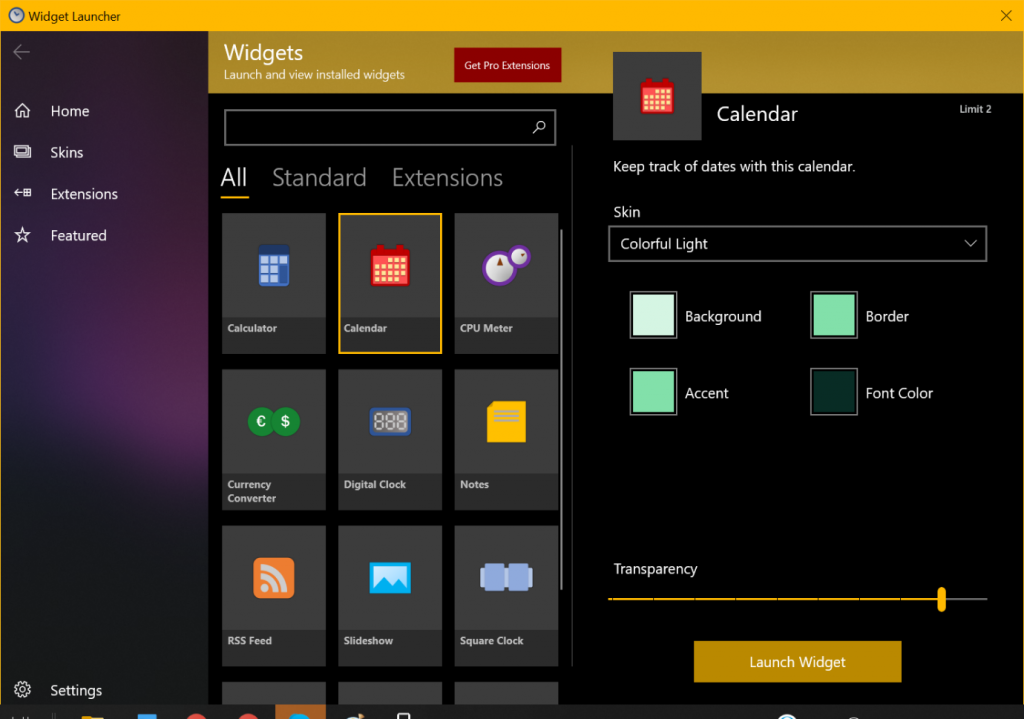
Step 6. Open the Widget Launcher and check all the inbuilt widgets. Configure the settings and click on the Launch Widget button. The selected widget will be tagged on your desktop screen.
Summing Up
These tips on how to get Windows 10 desktop widgets can boost your productivity or appearance. These Widgets on Windows 10 can make your tools more approachable to quickly access frequent apps. Keep all your programs on the desktop that you access more often.


