How to Move Emails from One Account to Another Office 365 Using PowerShell?

Step By Step Guide to Move Emails from One Account to Another Office 365 Using PowerShell
Looking for a reliable solution on how to move emails from one account to another in Office 365 PowerShell? This guide will help you to perform the same operation with guided steps along with PowerShell you will get the easy and reliable alternate approach for the same operation. Let’s get into it!
Users may desire to migrate emails from one account to another for a variety of reasons. Some examples include a new person being added to a project team or a new replacement taking over a prior employee’s role, among others.
Administrators must copy emails from the source user’s mailboxes to the target user’s mailbox folder in these instances.
How Do You Do That? How to Transfer Emails from One Account to Another in Office 365?
That may be done manually using PowerShell, a Microsoft framework for automating operations with a command-line shell and a scripting language. This approach is quite difficult for non-technical users to understand.
Method 1: Move Emails from One Account To Another Office 365 Using PowerShell
PowerShell is a task automation system that runs on many platforms and contains a command-line shell, a scripting language, and a configuration management framework. PowerShell is available for Microsoft Windows, Linux, and macOS.
Therefore, in this article, automated software will be presented, which may make even the most technically challenged person’s job easier.
Here are the prerequisites in order to start the migration process:
Step 1: Pre-migration Stage
- Preparation of the Domain
The following steps are involved in domain preparation:
➔ Ascertain that you have enough licences for the required Microsoft 365.
➔ To ensure a seamless transfer, create admin accounts in both the source and target systems.
➔ Create user mailboxes, room/resource mailboxes, and distribution groups in the target.
➔ Use AD DS tools to execute AD DS consolidation and, if required, manually or automatically sync the source domain with the target domain.
➔ Following the transfer, train your end customers on how to utilize Microsoft 365.
- Domain verification
➔ Begin with Microsoft 365 by validating the target tenant domain.
➔ Create DNS TXT records and connect a source domain to the target Microsoft 365 admin centre.
➔ Confirm that the domain is only being used by one tenant. If this criterion is not satisfied, the verification will fail.
After completing these steps, the change will take around 72 hours to become evident.
- Migration Scheduling
➔ Make a list of the user mailboxes to be relocated, as well as a CSV file for mapping.
➔ Take notice of the MX record’s lowest TTL value (of the primary email domain).
➔ To prevent changes to the source tenant’s AD DS account from being synchronised to the Microsoft 365 platform, disable directory sync for the source tenant (through the Microsoft 365 admin centre). The deactivation process might take up to 24 hours to complete.
- Migration Stage
➔ Put a stop to the flow of inbound mail.
To stop inbound mail flow to the originating tenant, change the main MS record to an unreachable value or utilise a third-party solution. You can simply plan the time for this step because you recorded the lowest value of TTL on the MX record (of the primary email domain) during the preparation process.
➔ Source for tenant preparation
Before moving the Office 365 mailbox to another tenant, the primary mail domain should be removed from all objects in the originating tenancy.
➔ Reset the default email address to the Microsoft 365 account’s initial email address.
➔ Using the Lync Admin Portal, remove all Lync licenses from the source tenant.
➔ Restore the original domain’s default email address for distribution lists, rooms, and resources.
➔ All tenant objects should have their secondary email address removed.
➔ Run the command Get-MsolUser -DomainName xyz.com in Windows PowerShell to get any objects still utilizing the primary email address or rejecting removal.
➔ Getting the target domain ready
➔ It entails confirming the source tenant in the destination domain (do one hour after the previous step).
❖ Configure the auto-discover CNAME.
❖ You must build a new domain in the target tenancy when using AD FS.
❖ Activate and assign licenses to the target domain’s new user accounts.
❖ Make the source domain’s primary email address the primary email address for new users (done using Windows PowerShell). Make a decision on how to convey passwords to end users as well.
❖ Once the user mailboxes are active, change the mail routing and point the MX record to the new Office 365 email address.
❖ Examine the flow of mail into and out of the target tenant.
Step 2: Migration Process
Note:
- Move the mail calendar and contacts to the destination tenant mailbox separately if you have 500 or less users. Any condition, such as a date, can be used to limit the transmission of emails.
- Use the multi-pass approach to send data in phases if you have 500 or more users. You can only transmit contacts, calendars, and a week’s worth of data at a time.
Steps to Move Emails From One Account to Another In Office 365 PowerShell?
You should be aware, however, that to run the PowerShell scripts, you must be a member of the Discovery Management Group. Certain PowerShell cmdlets are not otherwise available. For instance, Search-Mailbox.

Step 1: Use PowerShell to connect to Exchange Online.
Step 2: Run the script below to find and copy messages from user A to user B.


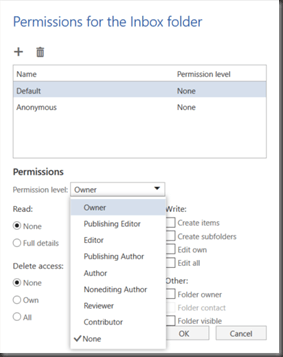
Step 3: If you have access to their Office 365 OWA account, just login, right-click the top-level folder, and choose rights.
Step 4: Add the person who needs permissions and pick the permission level. The user’s mailbox will appear on the target user’s mail profile to select to export to PST.
This approach is highly technical and gets quite tiresome if the user has no idea how to proceed with it.
As a result, the finest approach that can aid even non-tech aware people is provided below. The tool’s features, as well as the actions you must take, will be described so that you can easily grasp how to use the tool.
Method 2: Transfer Emails from One Office 365 Account To Another Using a Professional Tool
Users can use the Office 365 Merger to export their entire Office 365 tenant user mailboxes. The program offers a date filter option to assist you to save time while transferring data. Simply by setting the filters, one may export emails, contacts, calendars, and documents between the “From” and “To” date ranges.
Apart from that, users may transfer emails, contacts, calendars, and OneDrive documents. However, if users just need to move a few data items, they can use the program pane to check or uncheck the boxes. To learn how to utilize the tool, follow these steps:
Detailed Steps to Move Emails from One Account to Another Office 365
Step 1: Install and launch the application on your local machine, then select Office 365 as the source and destination from the first screen.
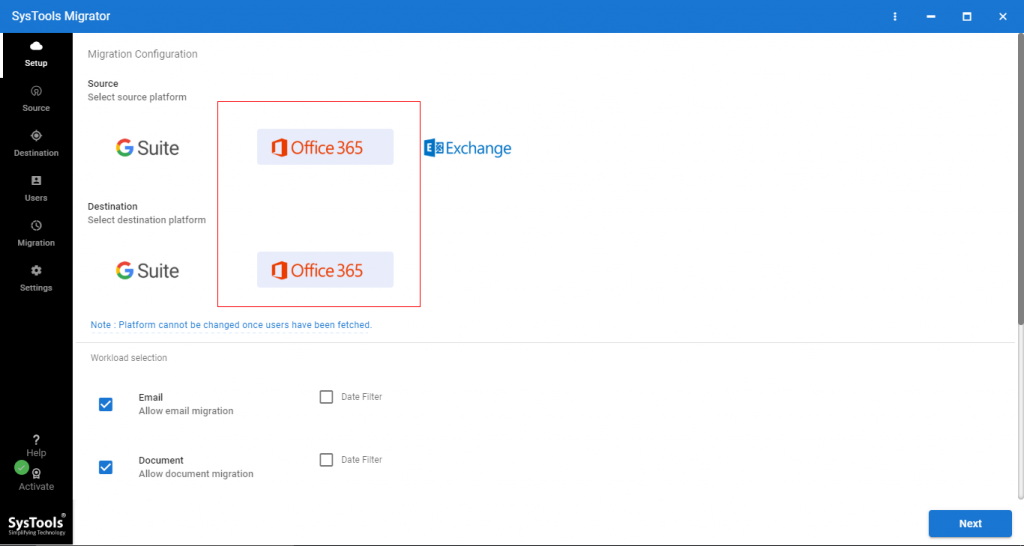
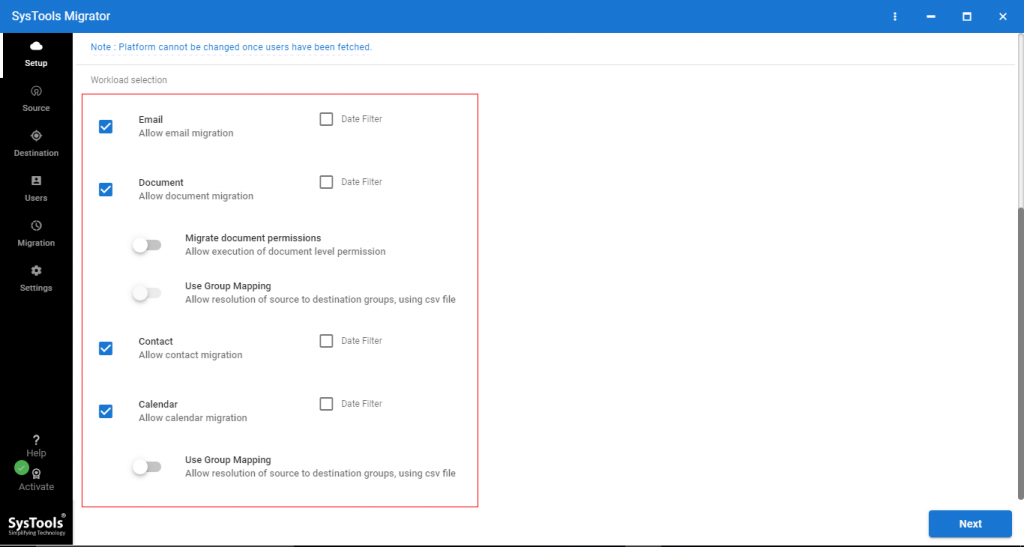
Step 2: Select items from the workload area (email, contacts, calendars, documents).
Then, click the Next button.
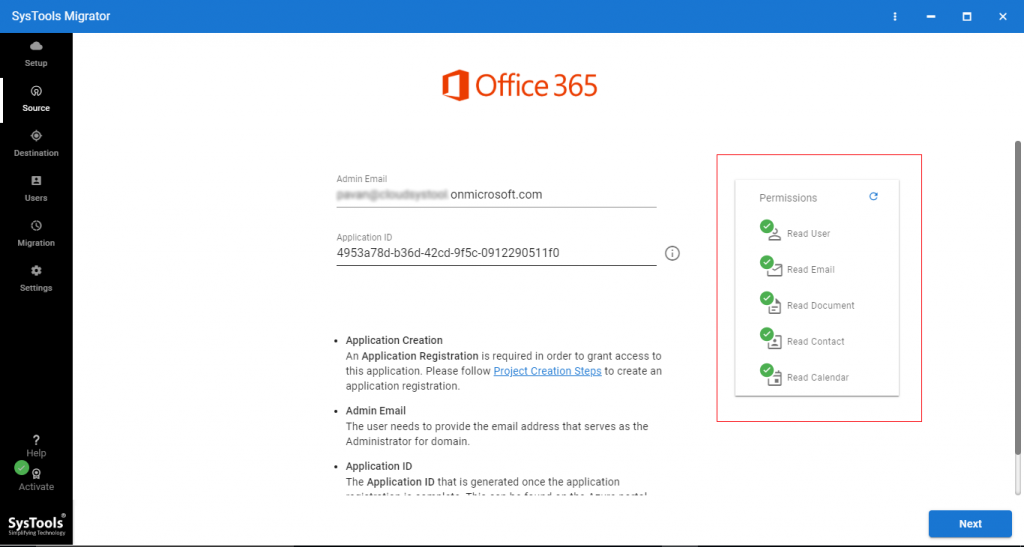
Step 3: To validate authorization, enter the source Office 365 admin ID and application ID into the appropriate fields, then click the Validate button in order to move emails from one account to another in Office 365.
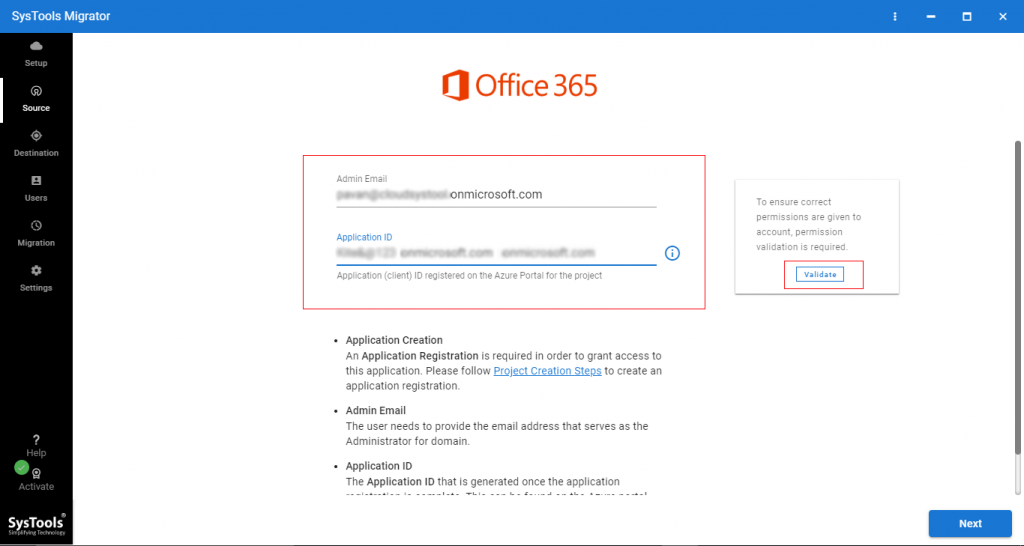
Step 4: After you’ve confirmed your permissions, click the Next button.
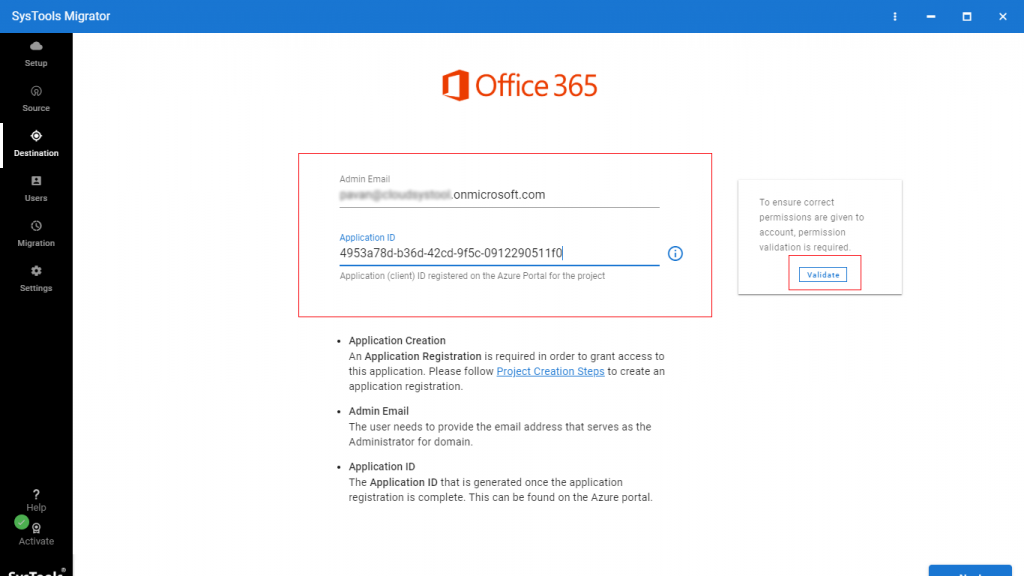
Step 5: Click the Validate button after entering the target Office 365 admin ID and Application ID.
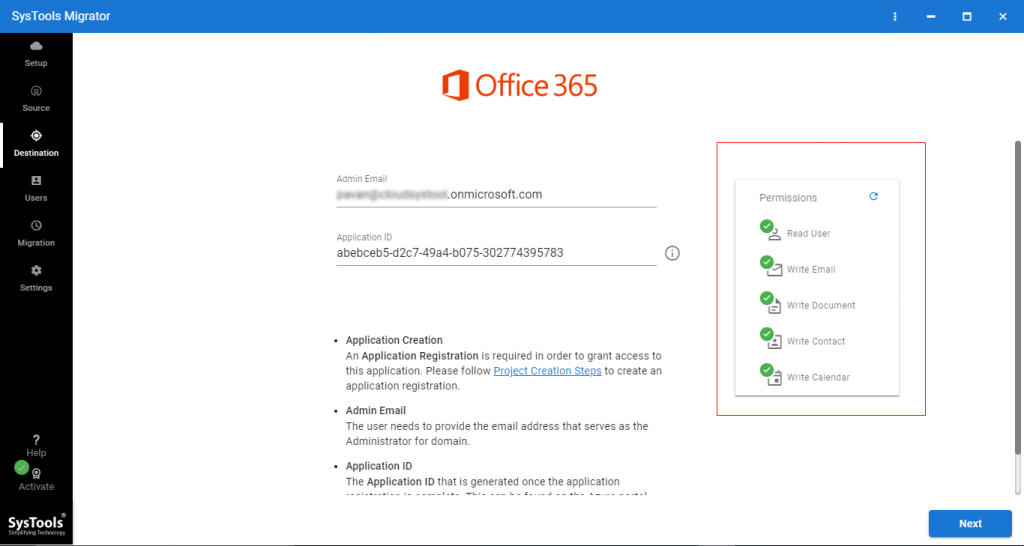
Step 6: After you’ve verified the rights, click Next.
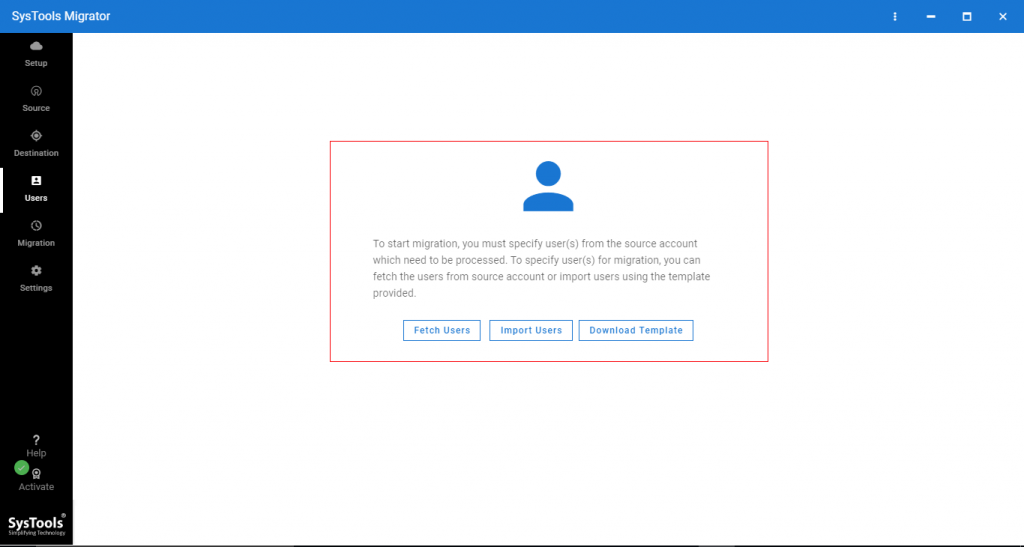
Step 7: We must now create a mapping between the users at the source and destination. The program has three alternatives for completing this operation: retrieve users, import users, and download the template in order to copy emails from one account to another in Office 365.
Step 8: The mapping between the source and destination users has been successfully performed.
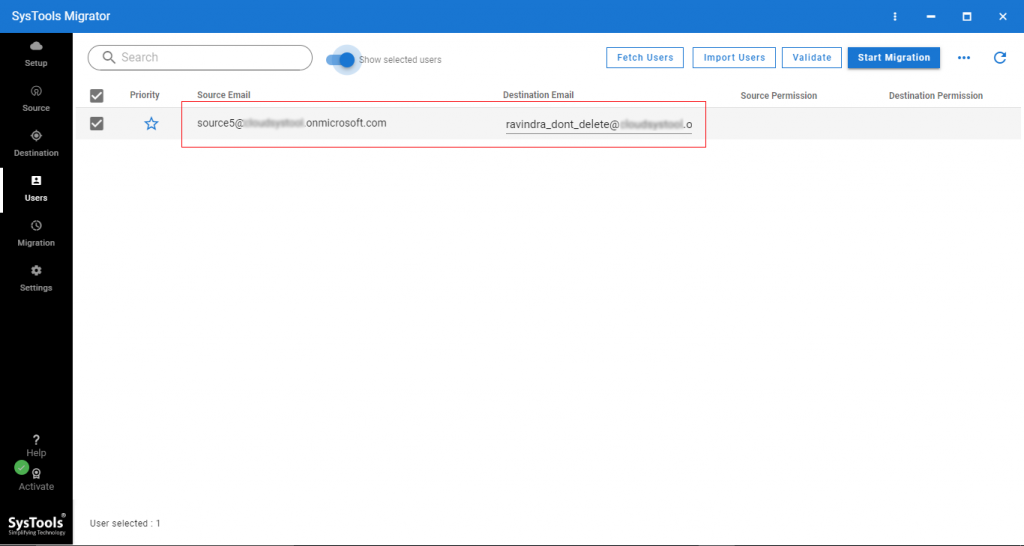
Step 9: Click the validate button to validate authorisation.
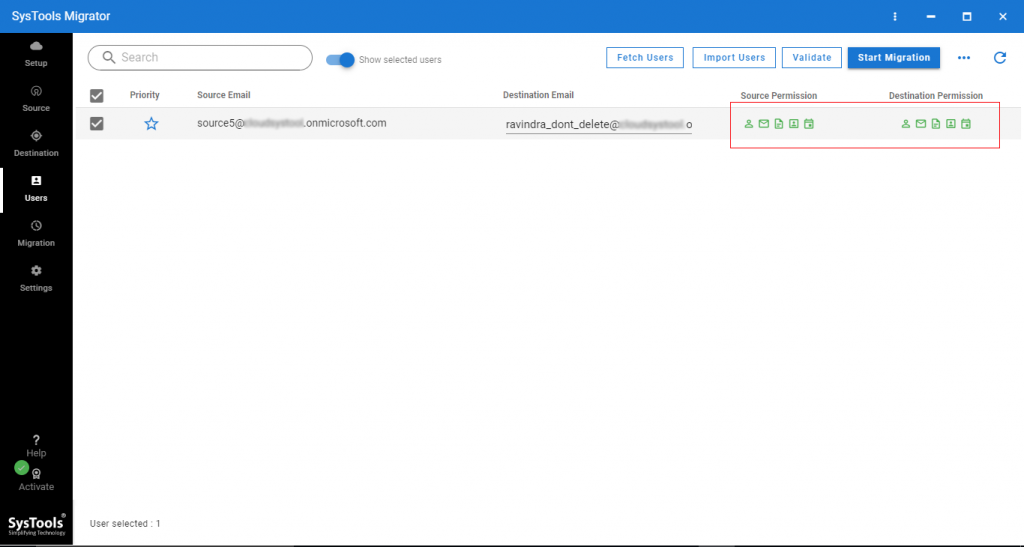
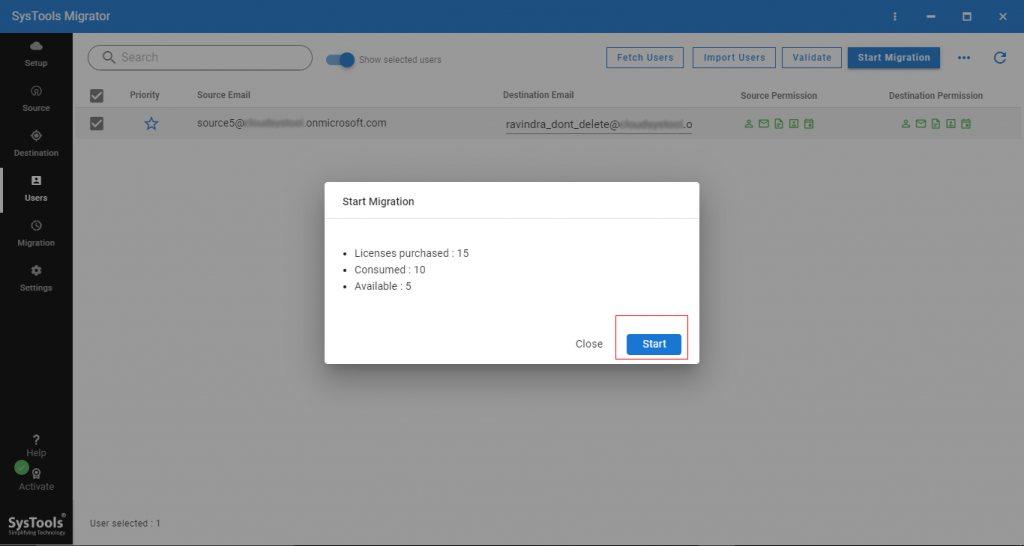
Step 10: After you’ve verified the permissions, click the Begin Migration button.
The Following are Some of the Tool’s Key Features:
- It will not reveal or save any information about the user’s Office 365 business account.
- You may also use filters to combine Exchange Online mailboxes if you like.
- By automatically authenticating the mailboxes, you may connect two Office 365 corporate accounts.
- For the mailboxes to be combined, valid Exchange Online mailbox details must be given.
- The ability to import data from Office 356 business accounts through a CSV file.
- It enables the aggregation of Office 365 business accounts as a result of a merger or acquisition.
Wrapping Up
If the user is using PowerShell for moving emails from one Office 365 account to another, then it might be a tough process. However, we have discussed the step by step solution using PowerShell.
Moreover, we have provided automated application called Office 365 merger for smooth and easy transfer data from one Office 365 account to another. User can use any of these depending on their needs and understanding.


