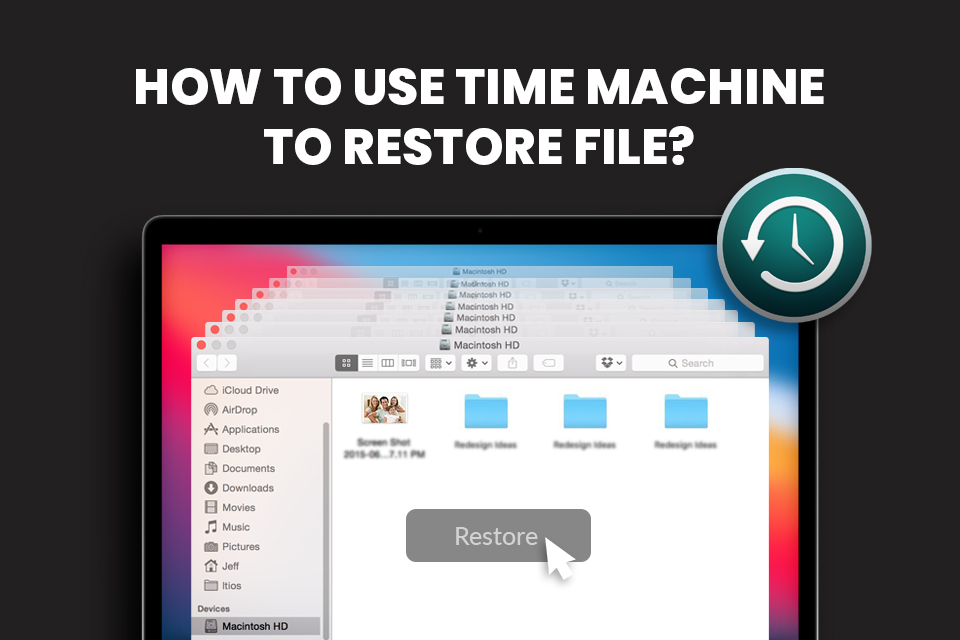
Have you deleted an important file and then, by sheer habit, emptied your Trash? Don’t worry! You can restore your permanently deleted file using the Time Machine backup drive. This post talks about Time Machine and how to use Time Machine to restore files on Mac running on Big Sur or any other macOS versions.

Time Machine a Backup & Restoration App
Time Machine is a native data backup and restoration application provided in macOS. It is a workhorse in data backup and performs incremental backups on an hourly, weekly, or monthly basis. The Time Machine app also offers a lot of flexibility. It allows you to set up a backup drive, set Time Machine preferences, back up Mac manually, or even pause or resume backup anytime. In addition, Time Machine automatically removes the oldest backup to free up drive space if the backup drive is filled up. If you have set up a Time Machine backup drive, use it to restore your lost file. If you haven’t set it up yet, you should do it as soon as possible to prevent future data loss events.
Set Up Backup Drive to Use with Time Machine
To set up a Time Machine backup drive, connect a large-capacity external hard drive to your Mac. Please note that the external drive should be empty and should not be used for purposes other than Time Machine backup. On connecting the drive, macOS prompts you to use the drive to back up with Time Machine. In the dialog window, click the “Use as Backup Disk” button. The Time Machine app opens and asks you to erase the drive. Click Erase if you know the storage medium doesn’t have any important files. Else, click Cancel and copy all critical files to your Mac or another external storage drive before proceeding.
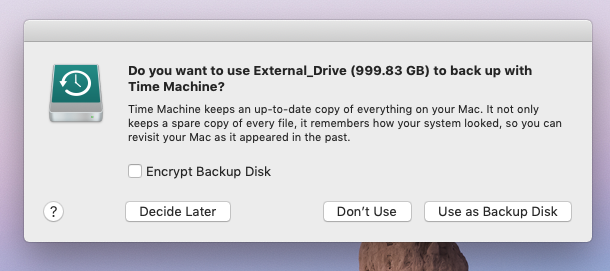
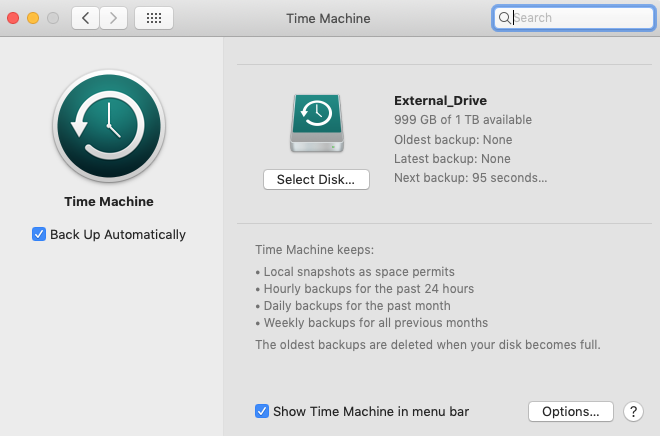
If you don’t get a prompt, you can manually set up a backup drive. Go to Apple menu > System Preferences > Time Machine and click “Select Backup Disk.” Then, choose the external drive and select “Use Disk.” Erase the disk when prompted. When the backup disk is assigned, Time Machine performs the full backup of your Mac without needing any further actions from your side. In case the auto-backup feature is disabled, enable it from Time Machine preferences. Navigate to the Apple menu > System Preferences > Time Machine and click the “Back Up Automatically” checkbox.
Perform Time Machine Backup Manually
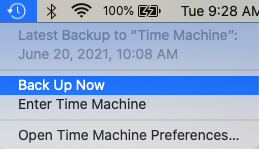
Whenever you create some crucial files, you can back them up manually at that very moment using the Time Machine > Back Up Now menu option from the Menu bar. This proactive measure helps you avoid data loss during the one-hour interval where the backup was not taken. Anyway, if you forget to backup manually, the auto-backup feature won’t let you down, but you should keep your Time Machine backup drive continuously connected to your Mac.
Permanent Data Loss Scenarios Wherein Time Machine Is Useful
Permanent data loss occurs on your Mac when you’ve deleted some files, then emptied Trash or used irreversible delete commands, say Delete Immediately, or Command + Option + Delete keys. Or when you’ve lost or deleted Mac volume or erased Mac storage drive. Permanent data loss also occurs when the drive’s file system turns corrupt suddenly or the files are encrypted due to viruses or malware. Time Machine can help you restore your lost files and protect you against sure shot data loss disaster in all such situations.
Restore File Using Time Machine
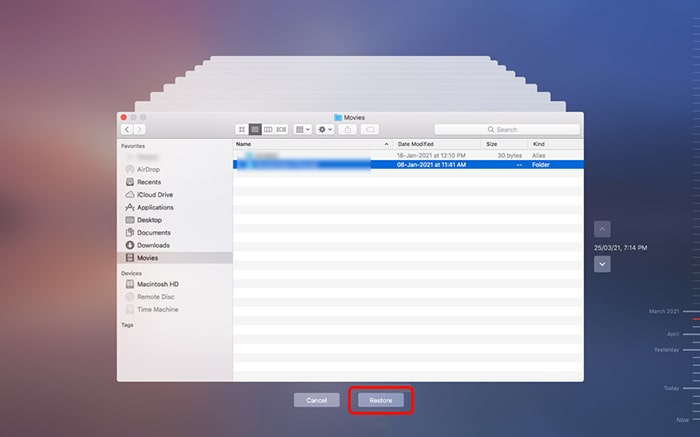
Time Machine app is easy to use for any particular file restoration purpose. To restore your lost, deleted, corrupt, or encrypted file using Time Machine, make sure the Time Machine backup medium is connected to your Mac. From the Menu Bar, navigate to Time Machine > Enter Time Machine. Now, look for the backup file you want to restore using Up/Down arrows or TimeLine. Now, select the file, then click Restore. Time Machine will restore the file to its original location instantly.
Limitations of Time Machine
When you haven’t connected your Time Machine backup drive to your Mac for incremental backup, in such a case, the backup is not updated. So, you won’t be able to restore your lost file by using Time Machine. Then, only file recovery software for Mac can help you scan the drive and recover your file. Try the free edition of renowned Mac file recovery software. If the tool could locate your files, use it to recover them to a different storage volume on your Mac or an external storage drive.
Final Thoughts
We hope the post helped you learn how to use Time Machine to restore your lost file on your Mac. If you haven’t set up your Time Machine backup drive, set it up to get all the data backup and restoration benefits. But when you haven’t backed up your Mac and lost your precious data more than 1 GB, you should use a data recovery software for mac to recover the lost data, provided you don’t use your Mac until data recovery is over. This prompt action can help you avoid any data overwriting and permanent data loss.


