How Do I Automatically Upload Files From PC To OneDrive? Expert’s Guide
Plot Summary: This article will shed light to the most often asked query i.e. “how to automatically upload files to OneDrive from PC?” If you are having the same query then follow this article and learn the step by step solution for the same.
OneDrive is the cloud storage platform provided by Microsoft for its users. To utilize OneDrive, you must first create a Microsoft Account, which you may do by visiting the Microsoft Account page. The users who have not subscribed to Office 365 get only 5GB of free space. However, the subscribers of Office 365 have an option to choose among 100 GB, 1 TB, or 6 TB of storage.
If your file is too big for a cloud storage platform, try FileWhopper. It’s an online file transferring service that allows sending large files fast.
There are many benefits of automatically uploading files to OneDrive which we cannot get by saving them on PC.
Some of them can be the ability to access the files from anywhere across the world, recover the files even if they are deleted or corrupted, sharing files with other people with ease etc.
With OneDrive, you can store not only documents but also photos, and other files online. You can even sync them across multiple computers and devices and share any file on OneDrive with other people.
Keeping in mind the various benefits of storing files on OneDrive, people are looking for options to automatically upload their files on OneDrive without any effort. Therefore, in this article, to ease you of your problems, the methods needed to automatically upload files on your OneDrive from the PC will be discussed.
Approaches To Automatically Upload Files to OneDrive from PC
Way 1: Using a Direct Way to Automatically Upload Files from PC to OneDrive
If you wish to automatically upload files from your PC to OneDrive, you should utilize the File System to OneDrive Migrator Tool. It is a quick app that will allow you to instantly transfer files from your PC to OneDrive.
This program does not impose any limitations on the amount of data that may be transferred from the PC to OneDrive. The data integrity is also preserved after the transfer.
The application comes with a filter that allows the user to include or exclude particular file types as desired. You may also use the Date-Filter to transmit certain data depending on the creation or change dates of the files.
Follow the instructions below to learn how to utilize the tool:
Step 1: Download and install the program on your computer.
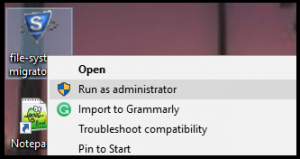
Step 2: After the installation is finished, run the software as administrator.
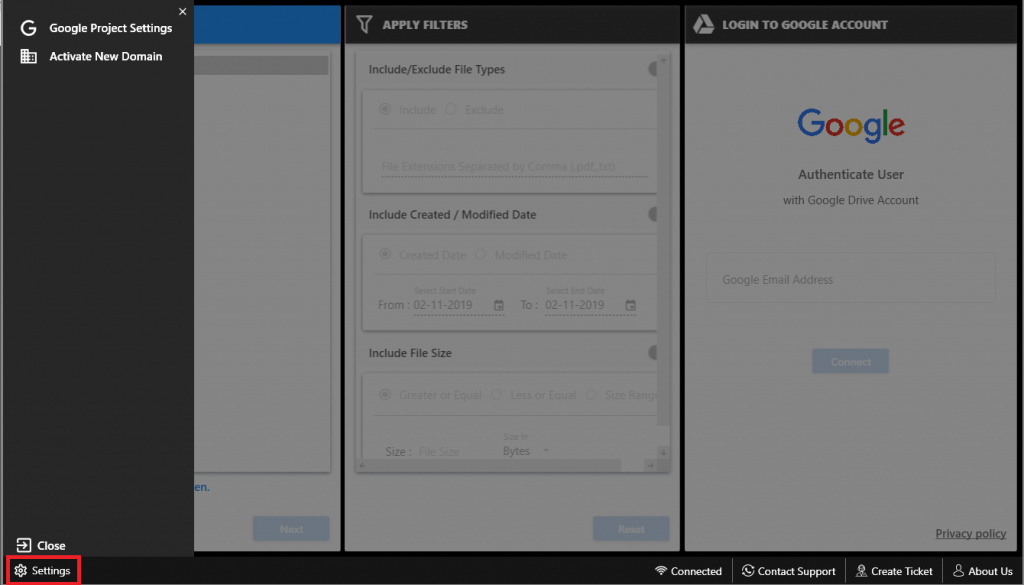
Step 3: To begin, go to the bottom left corner and select the Settings symbol.
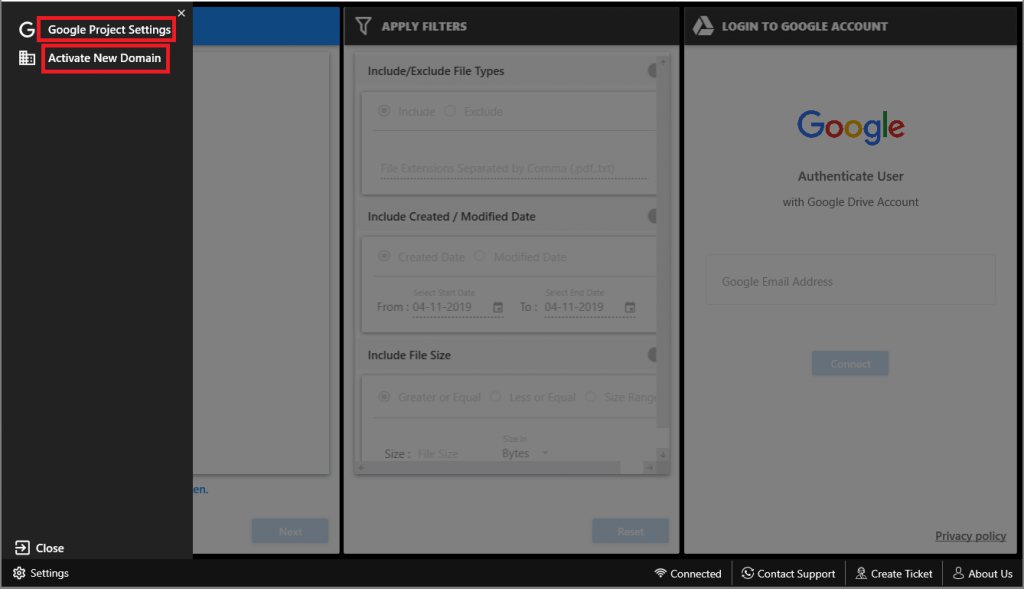
Step 4: You may now select from a number of cloud manual storage options. As an example, we’ve utilized Google Cloud Storage. To begin, go to Google Project Settings, add a JSON file, and provide your domain’s activation code in order to upload files to OneDrive from PC.
Step 5: Choose the folder or files to move to the Cloud.
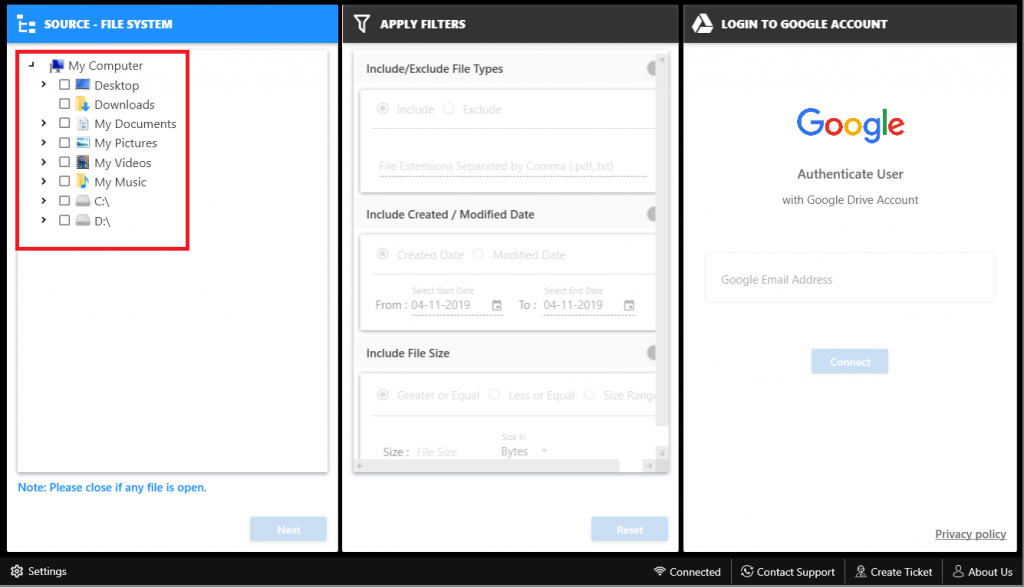
Step 6: Include or Exclude File Sorts, Include Created or Modified Date and Include File Size are the three types of filters available in this complex tool. Choose them according to your preferences in order to upload files from PC to OneDrive.
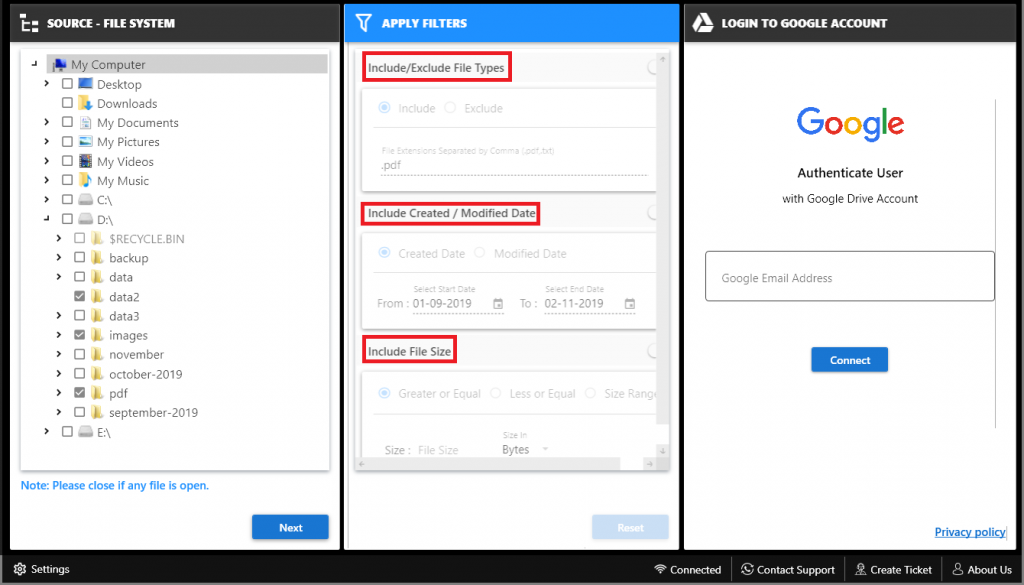
Step 7: After the data has been correctly filtered, go to the next screen and enter the Cloud storage company account (email address) before clicking Connect.
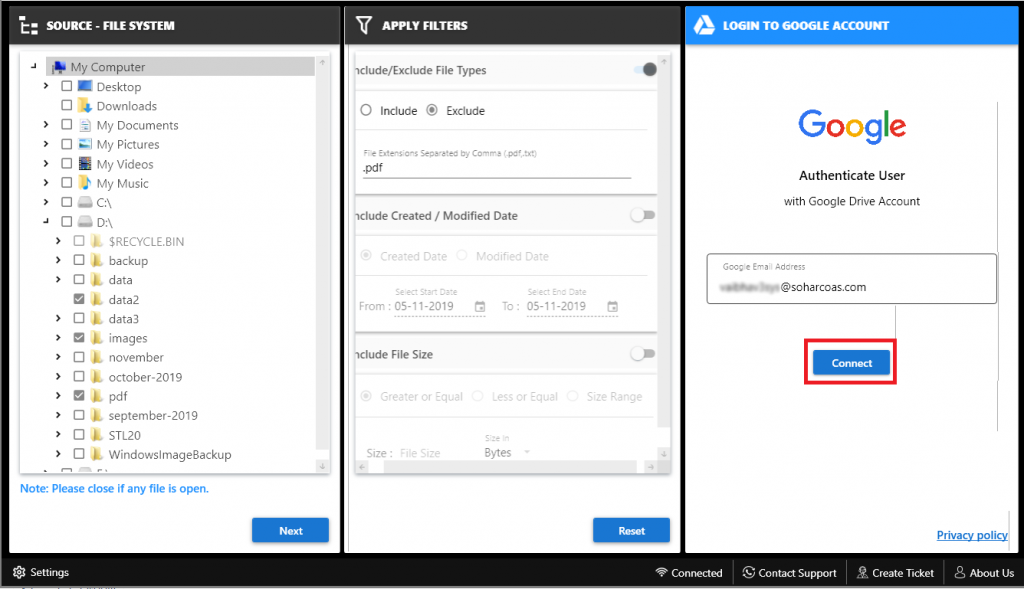
Step 8: Enter a destination location, choose either my drive or a shared drive, and then create a new folder to save the converted data.
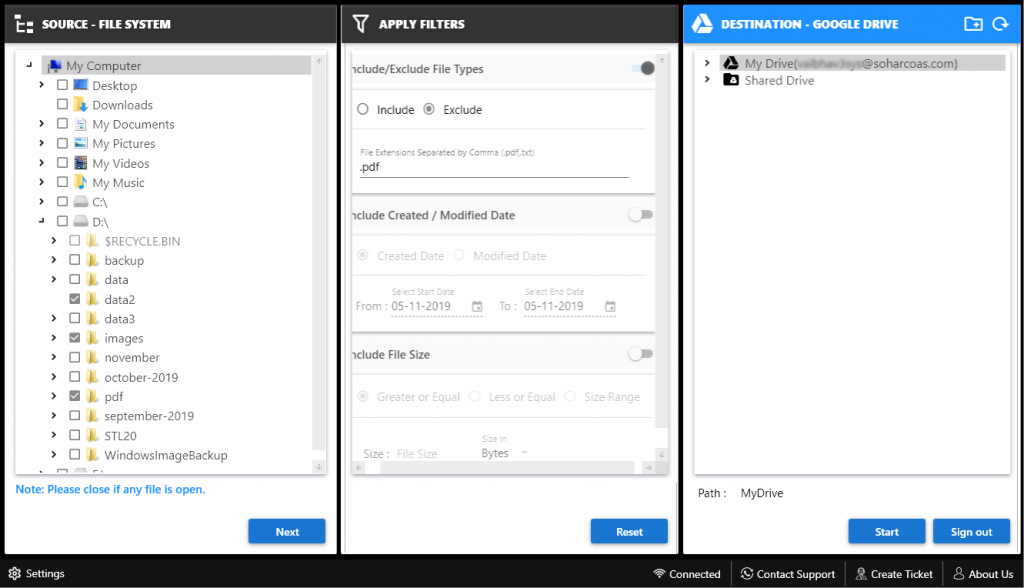
Step 9: You should be able to view the newly created folder (here Migrated data), so select it and click Start to upload files to OneDrive from PC.
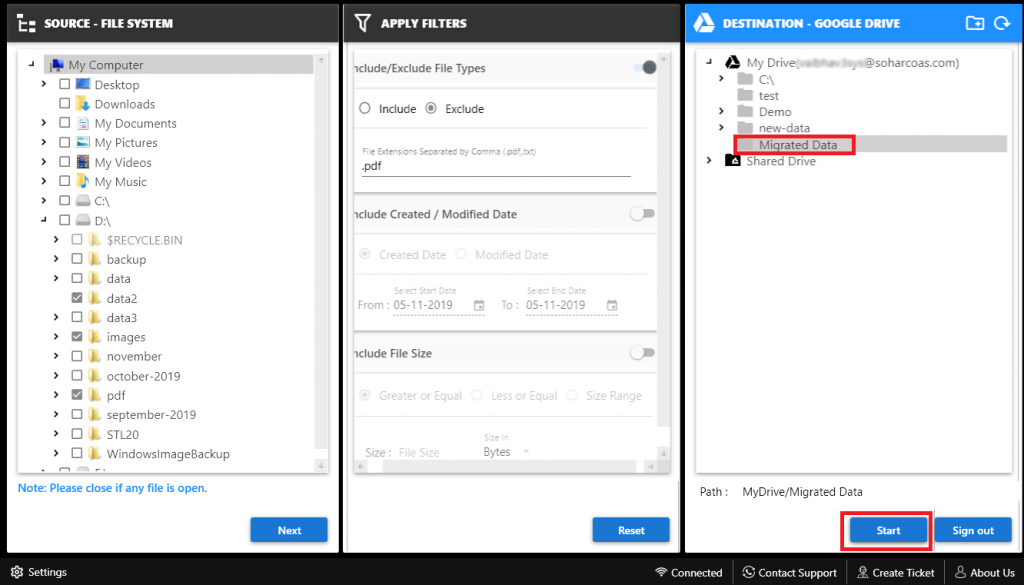
Step 10: The user dashboard now allows the user to quickly follow the status’s live progress.
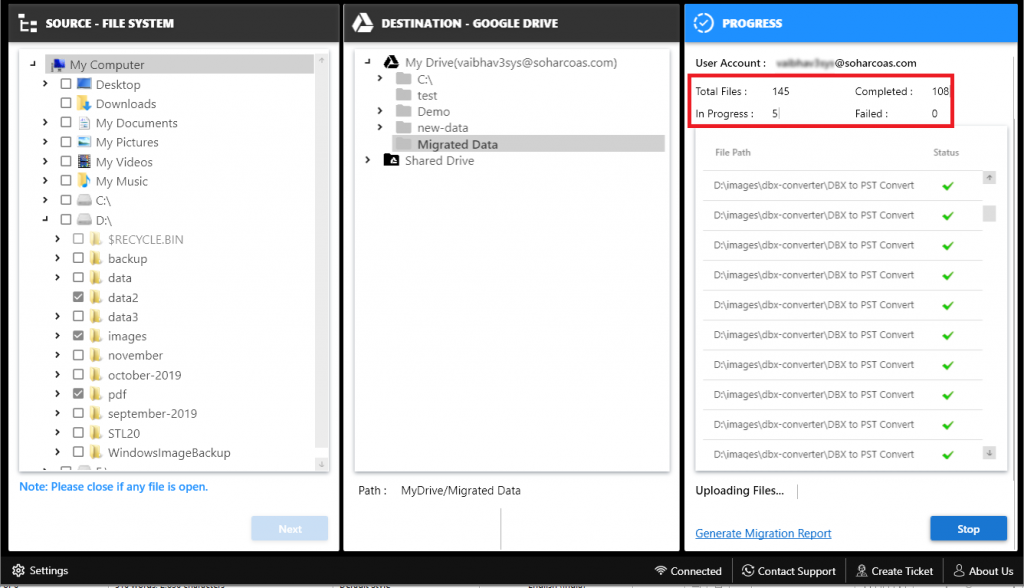
Total Files, In Progress Files, Completed Files, Failed Count, and File Location are all shown here.
Method 2: How to Automatically Upload Files to OneDrive from a PC Manually
Follow these steps to do it without the use of a third-party tool:
- On your desktop, download and launch the OneDrive program to begin the process of automatically upload files from your PC to OneDrive.
- Click Help & Settings, then the Settings button, to open the Options panel.
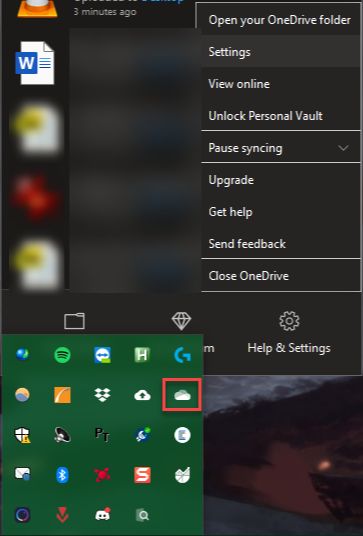
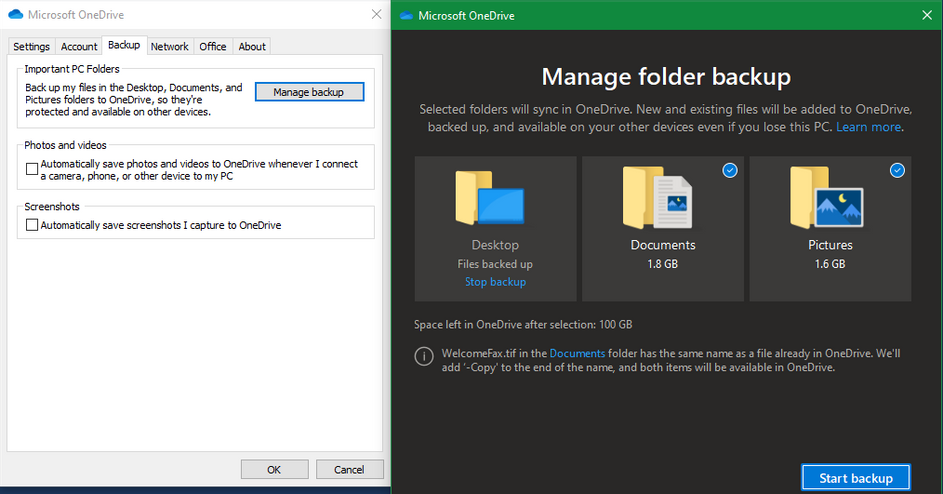
- Navigate to the Backup tab and select Manage Backup. This will open a new window.
- Select one or more of the Desktop, Documents, and/or Pictures folders to save data from single or many files.
- To upload files to OneDrive from PC, select the Start Backup option. Then, OneDrive will keep backing up your data from the directories you’ve specified.
Point to Note: This approach is only applicable to the desktop software since the Upload option on the cloud platform is insufficient for exporting large files, and it is only accessible on Windows OS version 10.
Last Words
This article answers the question of users who wish to automatically transfer files from PC to OneDrive. Their files are kept in the cloud via OneDrive, which has unquestionably numerous advantages. As a result, the reasons for, as well as the procedure for, automatically uploading files from a PC to OneDrive are explored here.


